
Introduction to Starbucks Cake Pop Recipe
Have you ever found yourself torn between wanting something sweet and not wanting to commit to a full slice of cake? That’s where cake pops swoop in like a superhero! They’re the perfect treat for dessert lovers who appreciate variety and portion control. Miniature, portable, and deliciously coated in chocolate, cake pops are the perfect indulgence for any occasion.
Why Cake Pops are a Game Changer for Dessert Lovers?
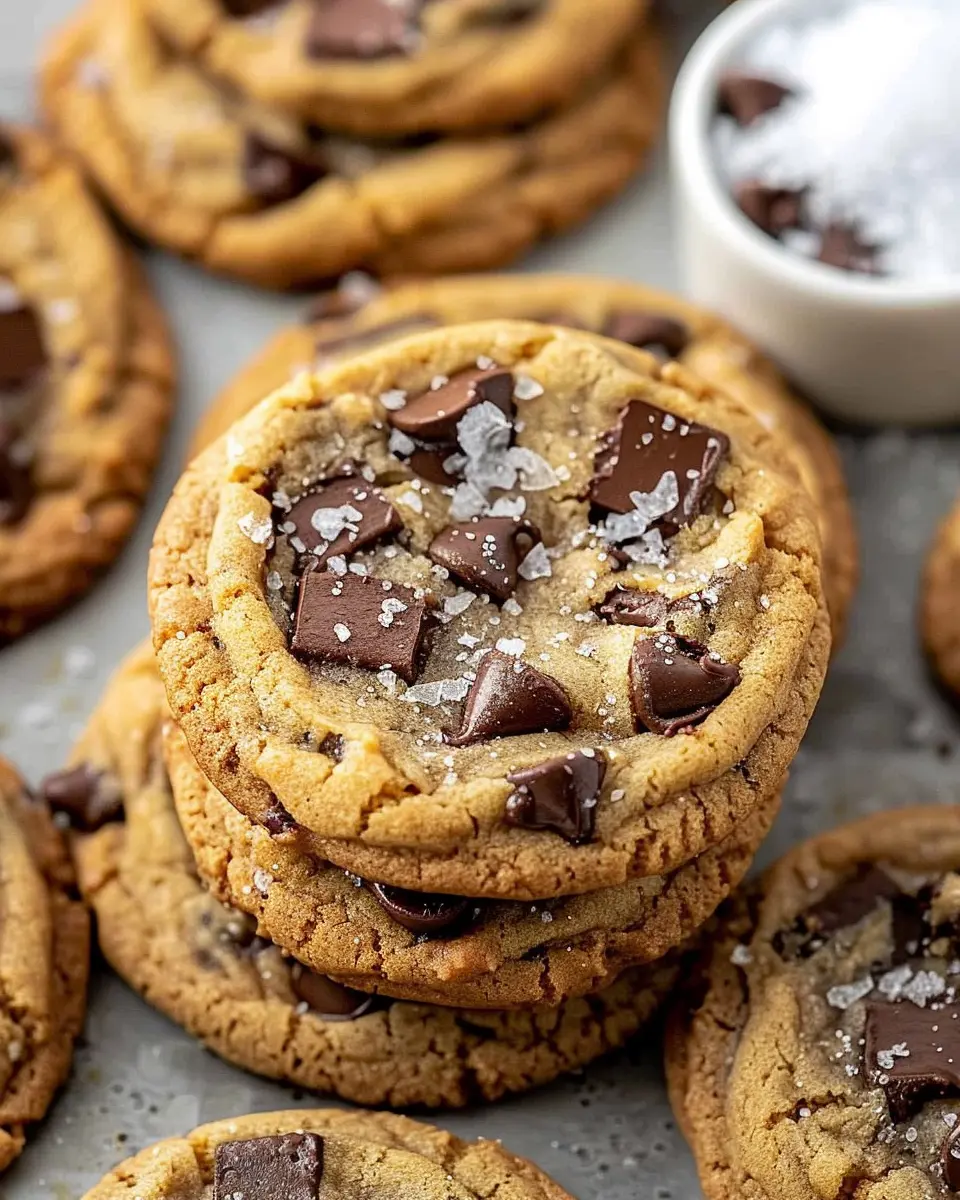
Cake pops blend the best of both worlds: the rich flavor of cake with the convenience of a bite-sized snack. These delightful little spheres come in various flavors, ensuring there’s a cake pop for everyone. Want something chocolatey? You’re covered. Prefer a fruity delight? There’s a pop for that, too! Plus, they can be coated in different toppings—think sprinkles, nuts, or even a drizzle of caramel. It’s a dessert that can be customized to match your mood (or the season!).
What’s more, making cake pops can be a fun and creative activity to do solo or with friends. You can turn it into a mini baking party, where everyone decorates their own pops. Picture yourself and your friends laughing and chatting while you dip your creations in chocolate and adorn them with colorful sprinkles. Not only do they taste amazing, but they also make a fantastic addition to any gathering or celebration, whether it’s a birthday, holiday, or just a casual get-together.
If you are a fan of the iconic Starbucks cake pop, you’ll be thrilled to know that making your very own Starbucks Cake Pop Recipe at home is easy and rewarding. With just a few simple ingredients and steps, you can recreate that classic flavor. Plus, you’ll save some cash compared to buying them by the dozen at your local café.
Stay tuned for our detailed recipe that will guide you through the process of whipping up these adorable treats that are sure to impress your friends and family. For a deeper dive into the origins and different varieties of cake pops, check out this fascinating article on cake pop history! And don’t forget to share your cake pop adventures with fellow dessert lovers!
Ingredients for Starbucks Cake Pops
Creating your very own Starbucks Cake Pop Recipe at home is not only fun but also satisfying. To bring your cake pops to life, you’ll need some essential ingredients, along with a few optional items to elevate your treat.
Essential ingredients you’ll need
To get started, gather these key ingredients:
- Cake: You can use any flavor you love, but chocolate or vanilla works beautifully.
- Frosting: This will help bind your cake. Cream cheese or buttercream is recommended.
- Candy melts: These are crucial for the outer coating; you can find them in various colors!
- Lollipop sticks: For the classic cake pop presentation.
Optional items to enhance your cake pops
Want to take your Starbucks Cake Pop Recipe to the next level? Consider adding some of these delightful enhancements:
- Sprinkles: Perfect for adding a colorful touch.
- Flavor extracts: A hint of vanilla or almond can add depth to your cake mixture.
- Drizzle chocolate: For an extra layer of flavor and aesthetics, drizzling melted chocolate over your pops is a great idea.
By pulling these ingredients together, you’ll soon find yourself indulging in a delightful homemade treat that rivals your favorite Starbucks pastries! For more tips on baking basics, check out this guide on cake baking techniques. Happy baking!
Step-by-Step Preparation of Starbucks Cake Pops
Making your own Starbucks cake pops at home may feel like a luxury, but it’s easier than you think! These sweet bites are perfect for sharing with friends, family, or even just treating yourself. Let’s dive into the step-by-step preparation process to create these delightful treats.
Bake the Cake
To kick things off, we need a solid base, and that means baking your cake. You can use a box mix for convenience, but for an upgrade, opt for a homemade recipe. Whether you choose vanilla, chocolate, or any flavor you like, bake the cake according to the instructions. Once baked, allow it to cool completely on a wire rack. This step is crucial because if the cake is warm, it will become too soggy when mixed later. If you’re looking for inspiration, check out this Homemade Vanilla Cake Recipe.
Create the Cake Dough
After your cake has cooled, it’s time to turn it into dough. Crumble the cake into a large mixing bowl, ensuring there are no large chunks remaining. The finer the crumbles, the easier it will be to form cake balls later. Next, add a small amount of frosting to the cake crumbles. This is where the magic happens! The frosting binds the cake, making it moldable. Start with a couple of tablespoons and add more as needed until the mixture holds together when pressed.
Form the Cake Balls
Now that you’ve got your cake dough ready, grab a small scoop or your hands, and start rolling the dough into balls about 1 to 1.5 inches in diameter. Nice, round balls are essential for that bakery-like appearance. Place these on a parchment-lined baking sheet, leaving some space between them. This part is almost like playing with dough, and it’s a great way to unleash your creativity.
Chill the Cake Balls
Once all the cake balls are formed, it’s time to chill them in the refrigerator for about 30 minutes. Why chill, you ask? Chilling helps the balls firm up, making them easier to dip later in the candy coating. Plus, it ensures they maintain their shape, so none of that beautiful work goes to waste!
Prepare the Candy Coating
While the cake balls chill, you can prepare your candy coating. Melt some chocolate or candy melts in a microwave-safe bowl in 30-second intervals, stirring between each interval until smooth. You can choose classic chocolate, vibrant colors, or even create a swirl for a stunning effect. If you’re interested in exploring more coating options, this article on Chocolate Melting Techniques might spark your creativity!
Assemble the Cake Pops
With the cake balls fully chilled and the coating melted, it’s time for the fun part—assembling the cake pops! Dip the end of a lollipop stick into the melted coating, then insert it delicately into a cake ball. This helps secure the stick. Next, coat the entire ball in the melted chocolate, allowing any excess to drip off. Make sure they are fully coated, as this creates a beautiful finish.
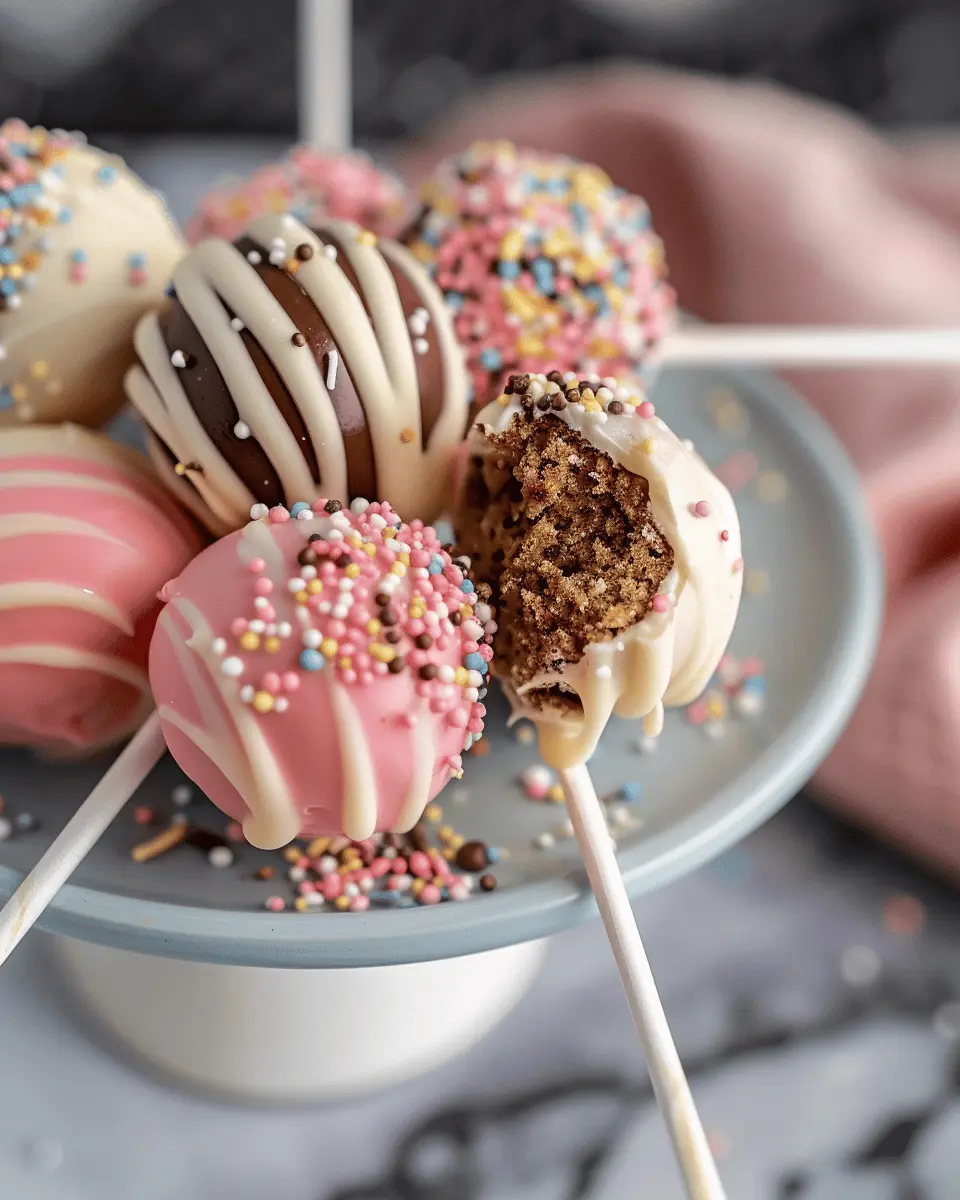
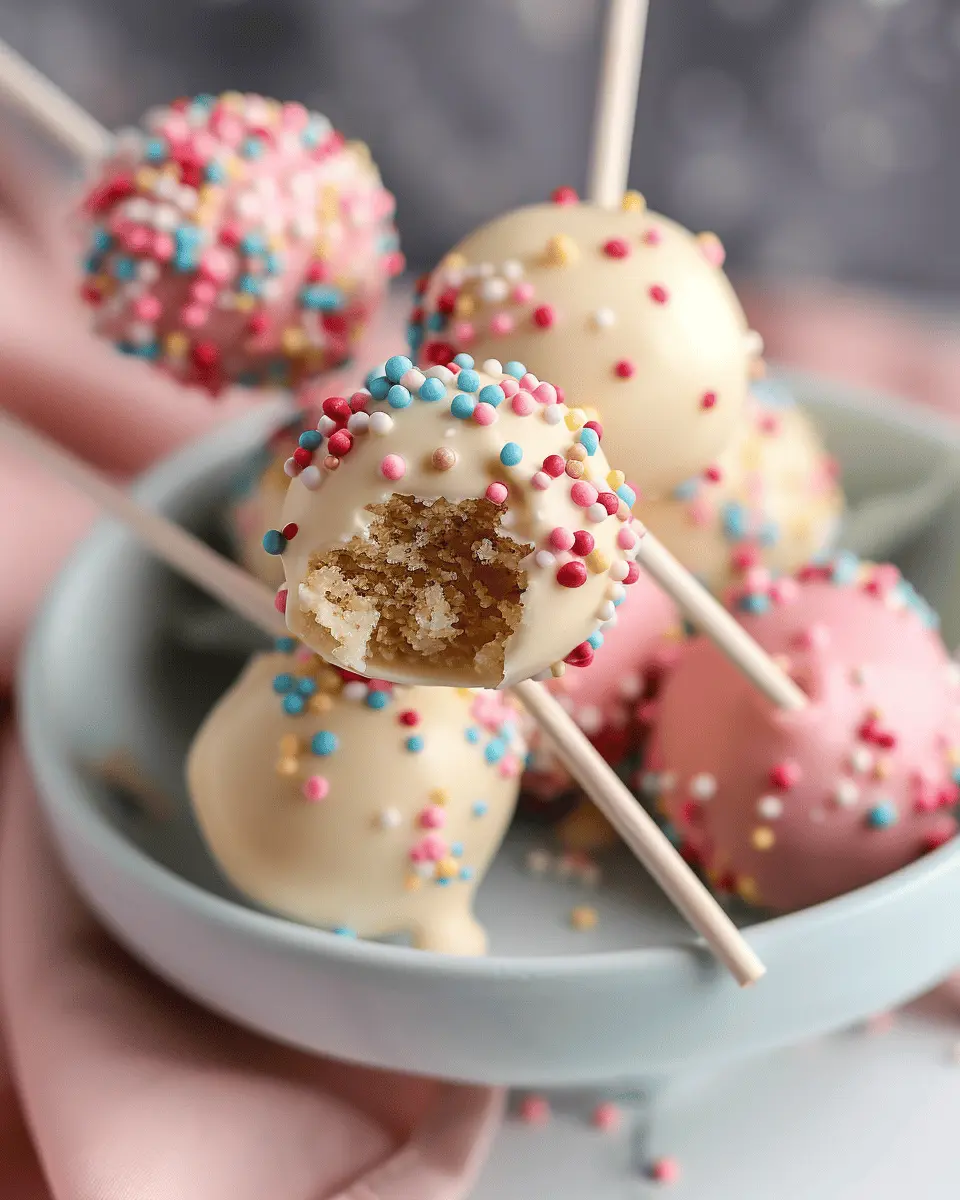
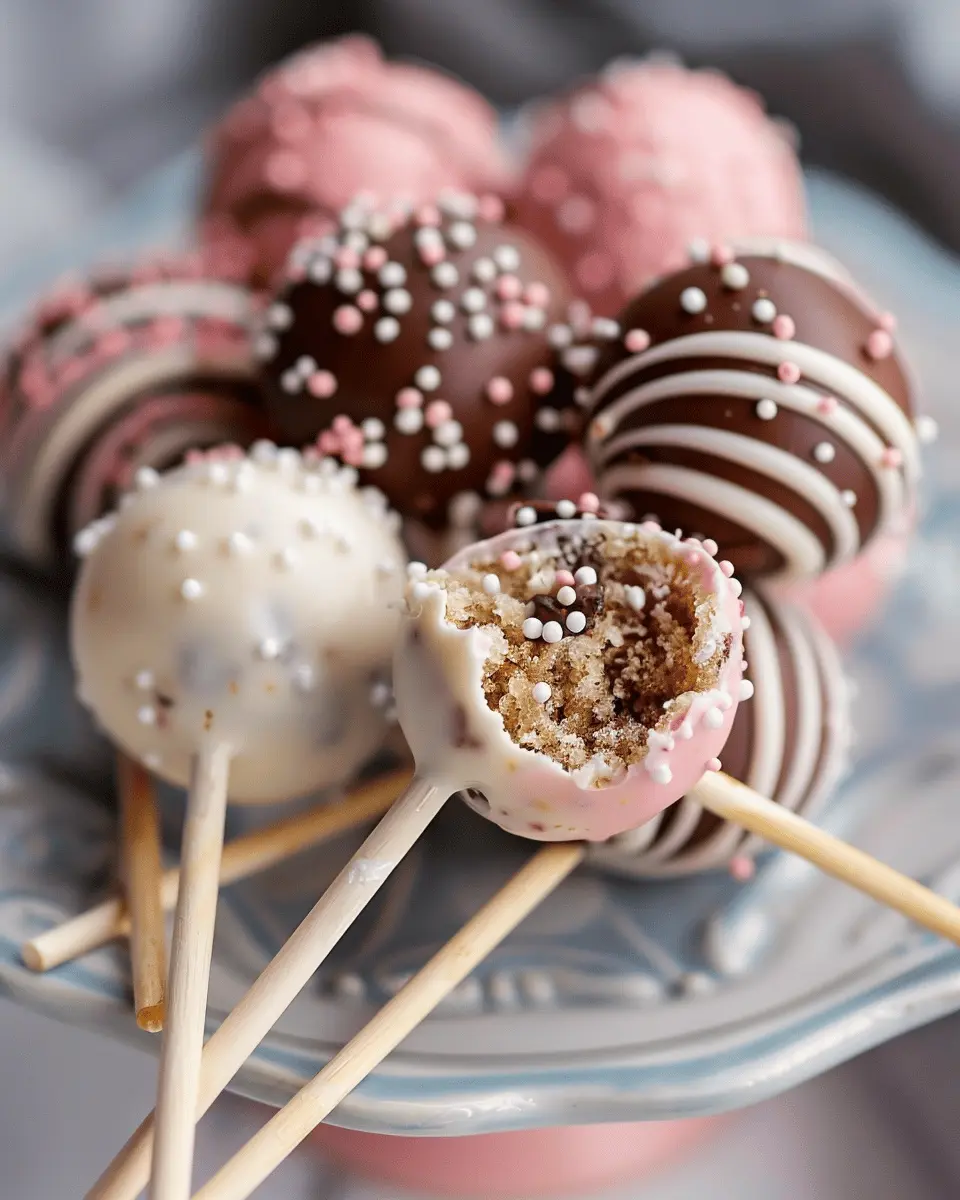
Decorate with Sprinkles
Last but not least, it’s time to add a finishing touch! Before the coating hardens, sprinkle your favorite toppings like colorful sprinkles, crushed nuts, or even edible glitter. You can even personalize them for special occasions—try adding themed sprinkles for birthdays or holidays! After decorating, place the cake pops upright in a block of foam or cake pop stand until the coating has fully set.
And there you have it! With these steps, you’ve crafted delicious Starbucks cake pops right in your kitchen. Not only do they taste amazing, but they’re also perfect for any occasion. Whether you’re hosting a get-together or simply indulging in a sweet treat, these cake pops are sure to impress. Now, what flavor will you choose for your next batch?
Variations on Starbucks Cake Pops
When it comes to cake pops, the beauty lies in their versatility! You can customize these delightful treats to suit your personal taste or occasion. Here are a few delicious variations that will keep your cake pop game exciting and creative.
Decadent Chocolate Cake Pop Variation
For chocolate lovers, nothing beats a classic chocolate cake pop. Simply swap out the vanilla cake base with a rich, moist chocolate cake. Combine crumbled chocolate cake with chocolate frosting for a truly indulgent treat. Dip these pops in dark or milk chocolate coating for that extra lusciousness. You might even sprinkle some chocolate shavings on top for an added touch of elegance and flavor!
Irresistible Red Velvet Cake Pops
Another fantastic option is to go with red velvet cake pops. The tangy flavor of red velvet pairs beautifully with cream cheese frosting. To create these pops, mix crumbled red velvet cake with cream cheese frosting, shaping them into irresistible balls. Dip in white chocolate or candy coating, and finish with a drizzle of dark chocolate to enhance the visual appeal. Your friends will be begging for the recipe!
Gluten-Free Cake Pops
If you’re looking for a gluten-free alternative, don’t worry—there’s a variation for that too. Use gluten-free cake mix to create the base and pair it with your favorite frosting. You can find plenty of great options at local health food stores or online. This way, everyone can enjoy these delicious Starbucks-style cake pops without the worry of gluten!
With these variations, you can easily impress your guests or treat yourself to something special. Don’t forget to share your creations on social media! And for more Starbucks Cake Pop Recipe insights, check out Serious Eats for expert baking tips.
Cooking Tips and Notes for Starbucks Cake Pops
Common pitfalls to avoid
Making the perfect Starbucks Cake Pop Recipe can be a fun adventure, but a few missteps can lead to frustration. Here are some common pitfalls to sidestep:
- Underbaking the cake: The cake should be fully cooked for a moist, cohesive texture. Trust your oven timer and use a toothpick to check.
- Using too much frosting: While it’s tempting to go heavy on frosting to bind the cake, too much can make them overly sweet and messy. Start small and adjust as needed.
- Not cooling properly: Allowing the cake balls to cool completely before dipping is crucial. If they’re warm, the coating won’t stick well.
Storage tips for freshness
To keep those delicious cake pops fresh for a longer enjoyment, try these storage tips:
- Refrigerate: Place your cake pops in an airtight container. They’ll stay fresh for about a week. For more info on storage methods, check out FoodSafety.gov.
- Freeze for later: If you want to make a large batch, pop them in the freezer. Just wrap them tightly before freezing. When you’re ready to enjoy, thaw them in the fridge overnight.
These thoughtful tips will help ensure your cake pops turn out perfectly delicious and stay fresh for your next get-together!
Serving Suggestions for Starbucks Cake Pops
Perfect occasions for cake pops
Whether it’s a birthday, holiday party, or even a casual get-together, Starbucks cake pops are the perfect treat to add a touch of sweetness to any event. Kids love their bite-sized nature, while adults appreciate their whimsical charm. You might even consider them for office gatherings or as a delightful treat at a baby shower. The versatility of these tiny delights makes them suitable for any age and occasion.
Creative presentation ideas
Elevate your Starbucks cake pop recipe with some fun and eye-catching presentation ideas:
- Colorful Displays: Arrange your cake pops in a decorative vase or a tiered stand to create a stunning centerpiece.
- Themed Decor: Match cake pop designs to your event theme, using sprinkles and colors that pop!
- Gift Treats: Wrap individual cake pops in clear cellophane and tie them with a ribbon for a thoughtful handmade gift.
For more inspiration, you can check out Dessert Table Ideas to really wow your guests. Cake pops not only taste great but can also become an art piece, making every moment special and sweet!
Time Breakdown for Starbucks Cake Pops
Preparation Time
Getting organized is key! For this Starbucks Cake Pop Recipe, plan on around 25 minutes for preparation. You’ll need time to bake, cool, and crumble your cake. Make sure you have all your ingredients and tools ready—having everything at hand will make the process smoother and more enjoyable.
Baking Time
While the magic happens in the oven, you can step away for about 30 to 35 minutes. Don’t forget to check your cake for doneness with a toothpick; it should come out clean when your cake is perfectly baked.
Total Time for Your Cake Pops
So, how long does it all take? You’re looking at approximately 1 hour to 1 hour and 5 minutes from start to finish. This includes preparation, baking, and the time it takes to let everything cool before you start shaping those adorable pops. Perfect for a fun evening project or a sweet treat to impress friends! For more insights on baking, check out Baker’s Journal for tips.
Nutritional Facts for Starbucks Cake Pops
Calories per cake pop
If you’re indulging in a delightful cake pop from Starbucks, you can expect to find around 160 calories in each one. While that’s a sweet treat for your palate, being mindful of the calories can help you fit your favorite snack into a balanced diet.
Nutritional highlights
The Starbucks Cake Pop Recipe mimics these popular sweets, but knowing what’s in them can make all the difference. Here are some nutritional highlights:
- Sugars: Cake pops can be high in sugars, which contributes to their delightful sweetness. A single pop can contain about 14 grams.
- Fats: These treats have an estimated 7 grams of fat, often derived from frosting or chocolate coating.
- Protein: While they’re not a protein source, you will get about 2 grams from the cake base.
By making your own cake pops, you have control over the ingredients—so feel free to substitute with healthier options, like whole grain flour or lower-sugar alternatives. Want to dig deeper into the nutrition details? Check out this resource for more insights!
How do you enjoy your cake pops? Do you pair them with your favorite beverage? These little indulgences can be a perfect match for coffee or tea, adding a bit of sweetness to your day while keeping your taste buds happy!
FAQs about Starbucks Cake Pop Recipe
When it comes to crafting the perfect Starbucks Cake Pop Recipe, you’ll likely have a few questions bouncing around in your mind. Let’s dive into some common FAQs to help you elevate your cake pop game!
How can I make my cake pops more moist?
To achieve ultra-moist cake pops, consider these helpful tips:
- Use frosting: Incorporating a bit more frosting into your cake mixture can add moisture and richness. Start with a tablespoon and adjust to your preference.
- Add a little milk: A splash of milk can also enhance the cake’s moisture. Just a couple of tablespoons will do the trick without overpowering the flavor.
- Bake less: If you’re using a cake mix, avoid overbaking. Check for doneness a few minutes early to prevent dryness.
What alternatives can I use for color melts?
If you can’t find color melts or want a healthier option, try these alternatives:
- Chocolate chips: Use white, dark, or milk chocolate chips and add food coloring to create fun hues. Just melt and stir!
- Coconut oil: Mix melted chocolate with coconut oil to achieve a smooth dipping consistency.
- Candy melts substitutes: If you’re feeling crafty, combine cocoa butter with food coloring for a homemade version.
How long do cake pops stay fresh?
Your cake pops’ shelf life will depend on how you store them. Here are handy guidelines:
- Room temperature: Storing them in an airtight container can keep them fresh for 1-2 days.
- Refrigerator: For longer storage, place them in the fridge for up to a week.
- Freezer: You can freeze cake pops for up to a month—just make sure they’re well-wrapped. This can be a lifesaver for those surprise parties!
With these tips, you’ll be well on your way to mastering your Starbucks Cake Pop Recipe. Happy baking! For more baking inspiration, consider checking out Food Network or Sally’s Baking Addiction.
Conclusion on Starbucks Cake Pop Recipe
Recap of why homemade cake pops are a must-try
In summary, the Starbucks Cake Pop Recipe is a delightful treat that brings joy to any occasion. Not only are they easy to make, but they also allow you to customize flavors and decorations to suit your taste. Imagine tantalizing your taste buds with rich chocolate or vibrant vanilla pops, all while impressing friends and family with your baking prowess.
Making cake pops at home means you can control the ingredients, ensuring that each bite is both delicious and fresh. So gather your supplies, invite some friends, and turn this simple recipe into a memorable experience. You won’t regret turning those cake scraps into a fun, tasty masterpiece! For more cake-inspired treats, check out this cake recipe that will further elevate your baking skills.
PrintStarbucks Cake Pop Recipe: Easy Copycat That Everyone Loves

This easy copycat Starbucks cake pop recipe is perfect for those who love the sweet and fun treats from the coffee shop.
- Prep Time: 30 minutes
- Cook Time: 15 minutes
- Total Time: 1 hour
- Yield: 20 cake pops 1x
- Category: Dessert
- Method: Baking
- Cuisine: American
- Diet: Vegetarian
Ingredients
- 1 cup cake mix
- 1/2 cup butter
- 1 cup powdered sugar
- 1/4 cup milk
- 1 teaspoon vanilla extract
- 1 pound white chocolate
- 1 tablespoon sprinkles
Instructions
- Prepare the cake mix according to the package instructions and allow it to cool.
- In a bowl, combine the cooled cake with butter and mix thoroughly.
- Form the mixture into balls and place them on a baking sheet.
- Chill the cake balls in the refrigerator for at least 30 minutes.
- Melt the white chocolate and dip the chilled balls into it, coating evenly.
- Place back on the baking sheet and sprinkle with toppings.
- Allow to set before serving.
Notes
- Use different flavors of cake mix for variety.
- Make sure the cake balls are completely chilled before dipping.
- Store in an airtight container.
Nutrition
- Serving Size: 1 cake pop
- Calories: 150
- Sugar: 12g
- Sodium: 100mg
- Fat: 7g
- Saturated Fat: 4g
- Unsaturated Fat: 2g
- Trans Fat: 0g
- Carbohydrates: 20g
- Fiber: 0g
- Protein: 1g
- Cholesterol: 20mg
Keywords: Starbucks, Cake Pop, Recipe, Copycat