Introduction to Baked Chickpea and Rice Balls
Baked Chickpea and Rice Balls are a delightful culinary creation that not only satisfies your taste buds but also acts as a great solution for the fast-paced lives of busy professionals. Imagine coming home after a long day, tired yet hungry, and having a delicious meal ready to devour in minutes! These little bites are packed with nutrients, fiber, and protein, making them a perfect addition to your weeknight meals—you can whip them up in advance and enjoy the benefits all week long.
Why Baked Chickpea and Rice Balls are a Game Changer for Busy Professionals
When you’re juggling deadlines, meetings, and social commitments, meal prep can feel daunting. Enter Baked Chickpea and Rice Balls: they’re versatile, nutritious, and can be adapted to suit your taste or whatever ingredients you have on hand. What’s not to love? Here are a few reasons these delightful bites can revolutionize your meal planning:
-
Quick and Easy: These balls come together in no time. Simply blend your ingredients, roll them into balls, and pop them in the oven. They bake to perfection while you unwind from your day.
-
Meal Prep Champion: You can make a large batch and store them in the fridge or freezer. This means you can have a nutritious snack or meal option on hand at any time. Throw them in a salad, serve with a dipping sauce, or enjoy them on their own.
-
Nutritious and Satisfying: Packed with chickpeas, brown rice, and your favorite vegetables, these balls are rich in protein and fiber—keeping you full and energized without the usual post-lunch slump.
-
Customizable: Feel like experimenting? You can incorporate various spices, herbs, and add-ins to suit your mood. Want some heat? Consider adding red pepper flakes. Craving more flavor? Try fresh herbs like parsley or cilantro! The possibilities are endless.
So, why not give Baked Chickpea and Rice Balls a shot? They’re not just a meal; they can be a real lifesaver in your busy week. For more information about the nutritional benefits of chickpeas, check out Healthline’s article.
Diving into the recipe is the next step, and I promise it’ll be worth it!
Ingredients for Baked Chickpea and Rice Balls
Essential ingredients for a flavorful dish
Creating Baked Chickpea and Rice Balls is not only easy but also incredibly satisfying. Here’s what you’ll need for this delicious recipe:
- Chickpeas: Canned or cooked from scratch, they are the star ingredient packed with protein and fiber.
- Cooked rice: A versatile base – use any type you prefer, such as brown or jasmine.
- Breadcrumbs: For binding and achieving that perfect crunchy texture.
- Onion and garlic: Chopped finely, they add a flavorful punch.
- Spices: Cumin, paprika, and salt work beautifully together to elevate the taste profile.
- Eggs: They help bind all the ingredients together.
These basics set you on the path to something truly delicious.
Optional ingredients for added flair
Want to take your Baked Chickpea and Rice Balls to the next level? Consider adding these optional ingredients:
- Fresh herbs: Cilantro or parsley can brighten up the flavors.
- Cheese: A sprinkle of feta or Parmesan adds rich, creamy goodness.
- Veggies: Incorporate grated carrots or zucchini for extra nutrition.
- Spicy kick: A dash of cayenne pepper can liven things up!
Mix and match these to suit your taste and dietary needs. Your creativity in the kitchen could lead to a delightful new version of these rice balls! To learn more about the benefits of chickpeas, check out Healthline’s article on legumes.
Preparing Baked Chickpea and Rice Balls
Baked Chickpea and Rice Balls are more than just a delicious snack; they’re a healthy, versatile option that can easily fit into your busy lifestyle. Ready to dive in? Let’s break it down step by step for a hassle-free cooking experience!
Preheat the oven and prepare your workspace
Before you start mixing ingredients, it’s essential to preheat your oven to 375°F (190°C). This will ensure that your Baked Chickpea and Rice Balls cook evenly and come out perfectly crispy on the outside. While the oven warms up, take a moment to prep your workspace. Gather all your ingredients and tools—this includes a mixing bowl, a fork or potato masher, baking sheet, and parchment paper. Having everything ready will streamline your cooking process, making it easier and more enjoyable!
Cook the rice and cool it down
The next step in our Baked Chickpea and Rice Balls adventure is cooking the rice. Short-grain brown rice works wonderfully here, but feel free to use what you have on hand.
- Cooking Instructions:
- Rinse 1 cup of brown rice under cold water.
- Bring 2 cups of water to a boil, add the rice, and reduce to a simmer.
- Cook for about 30-35 minutes until tender.
Once cooked, spread the rice on a plate to cool before adding it to the mixture. This little trick helps prevent soggy balls and enhances the overall texture.
Mash the chickpeas for the perfect texture
While the rice is cooling, it’s time to focus on the chickpeas. You can use canned chickpeas for convenience—just make sure to rinse and drain them thoroughly.
- Mashing Tips:
- Place 1 can (15 oz) of chickpeas in a mixing bowl.
- Use a fork or potato masher to mash them up, leaving some chunks for texture. Aim for a combination of smooth and chunky, as this gives your Baked Chickpea and Rice Balls a delightful bite.
Not only are chickpeas high in protein, but they also add a hearty component to your balls. Did you know that including legumes in your diet can reduce the risk of heart disease? (Source: American Heart Association)
Combine the ingredients to form a dough
Once you have your rice cooled and chickpeas mashed, it’s time to bring everything together.
- Ingredients to Add:
- 1 cup mashed chickpeas
- 1 cup cooled brown rice
- 1/4 cup breadcrumbs (gluten-free if needed)
- 1/4 cup grated Parmesan cheese (or a vegan substitute)
- 1 tablespoon chopped parsley
- 1 teaspoon garlic powder, salt, and pepper to taste
Mix everything in a large bowl until well combined. This is where you create the magic! If the mixture seems too wet, feel free to add a little more breadcrumbs to achieve the right consistency.
Shape the balls and place them on a baking sheet
With your mixture ready, it’s time for the fun part—shaping the Baked Chickpea and Rice Balls.
- Shaping Tips:
- Take a small amount of the mixture (about 2 tablespoons).
- Roll it between your hands to form a ball.
- Place the balls on a baking sheet lined with parchment paper.
Make sure to leave some space between them so they can crisp up nicely in the oven.
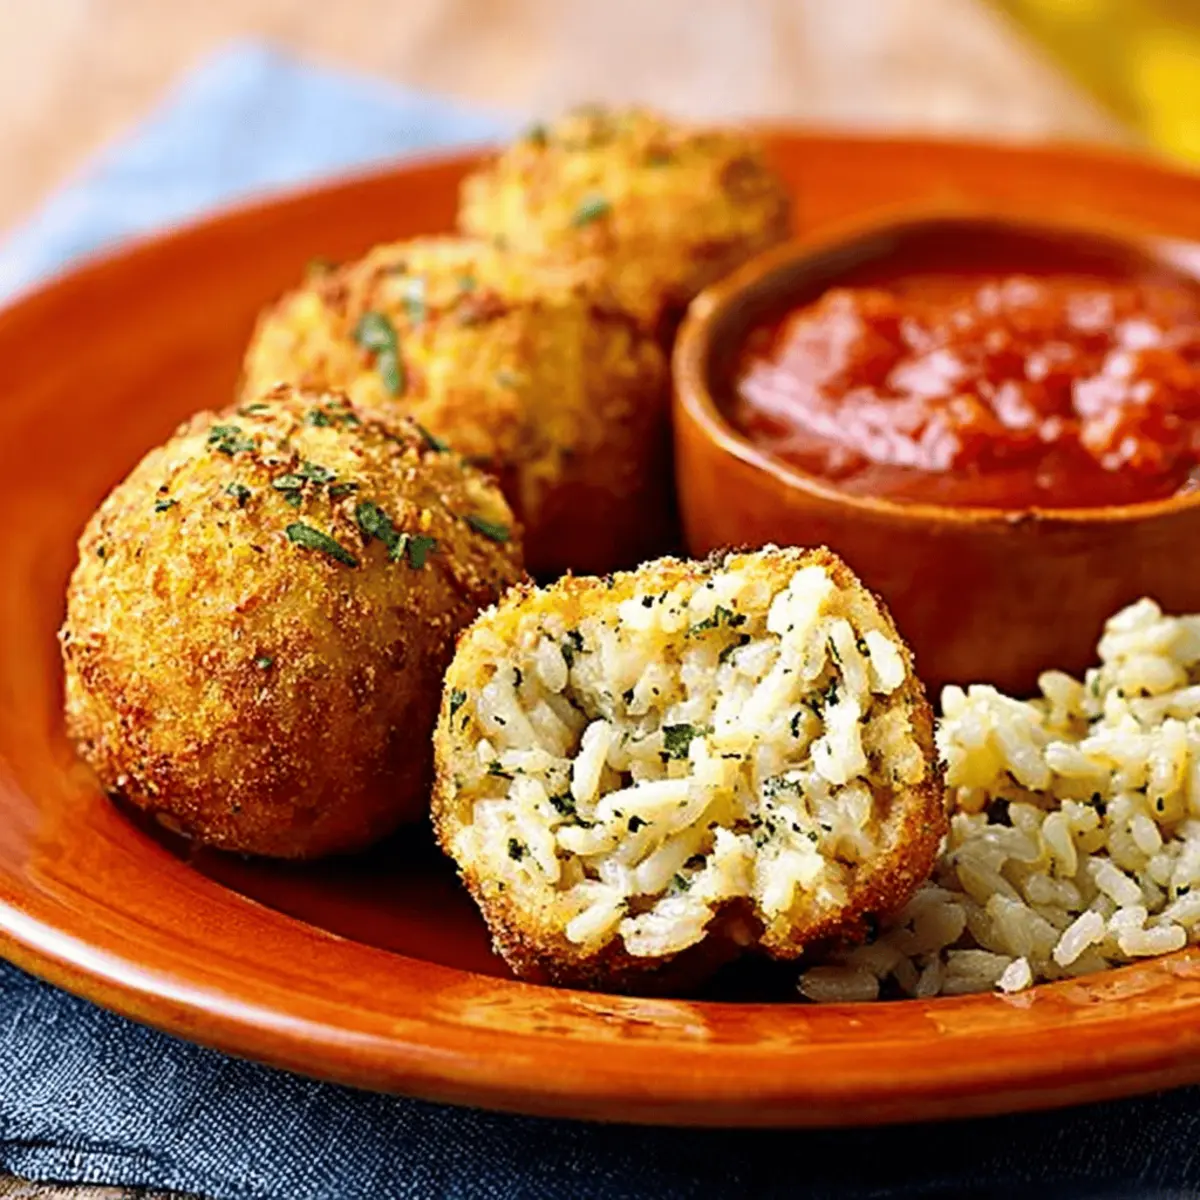
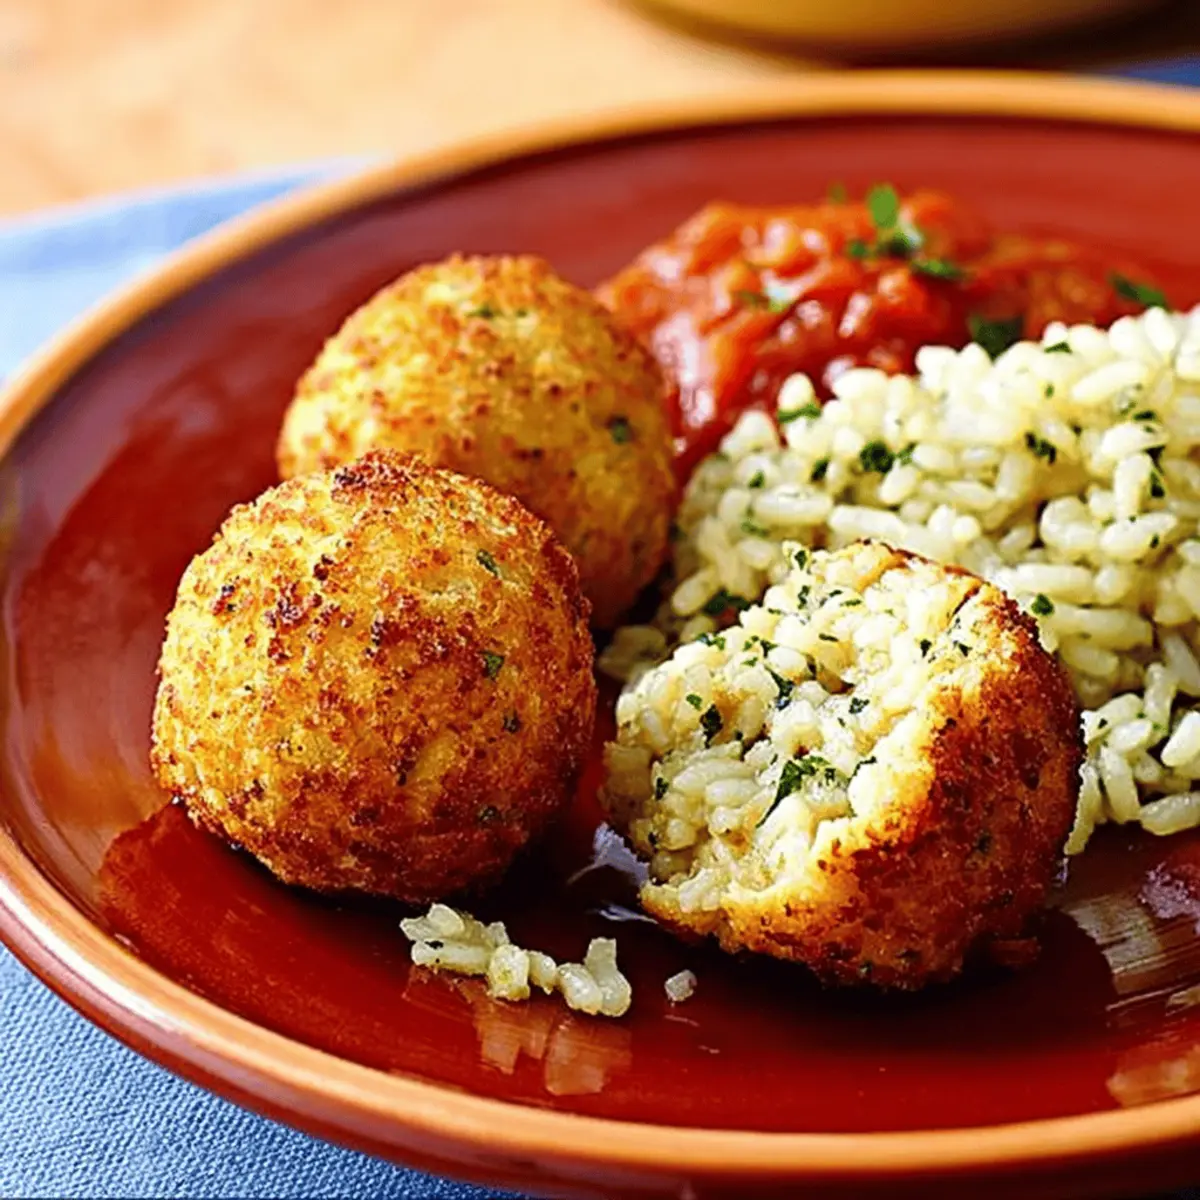
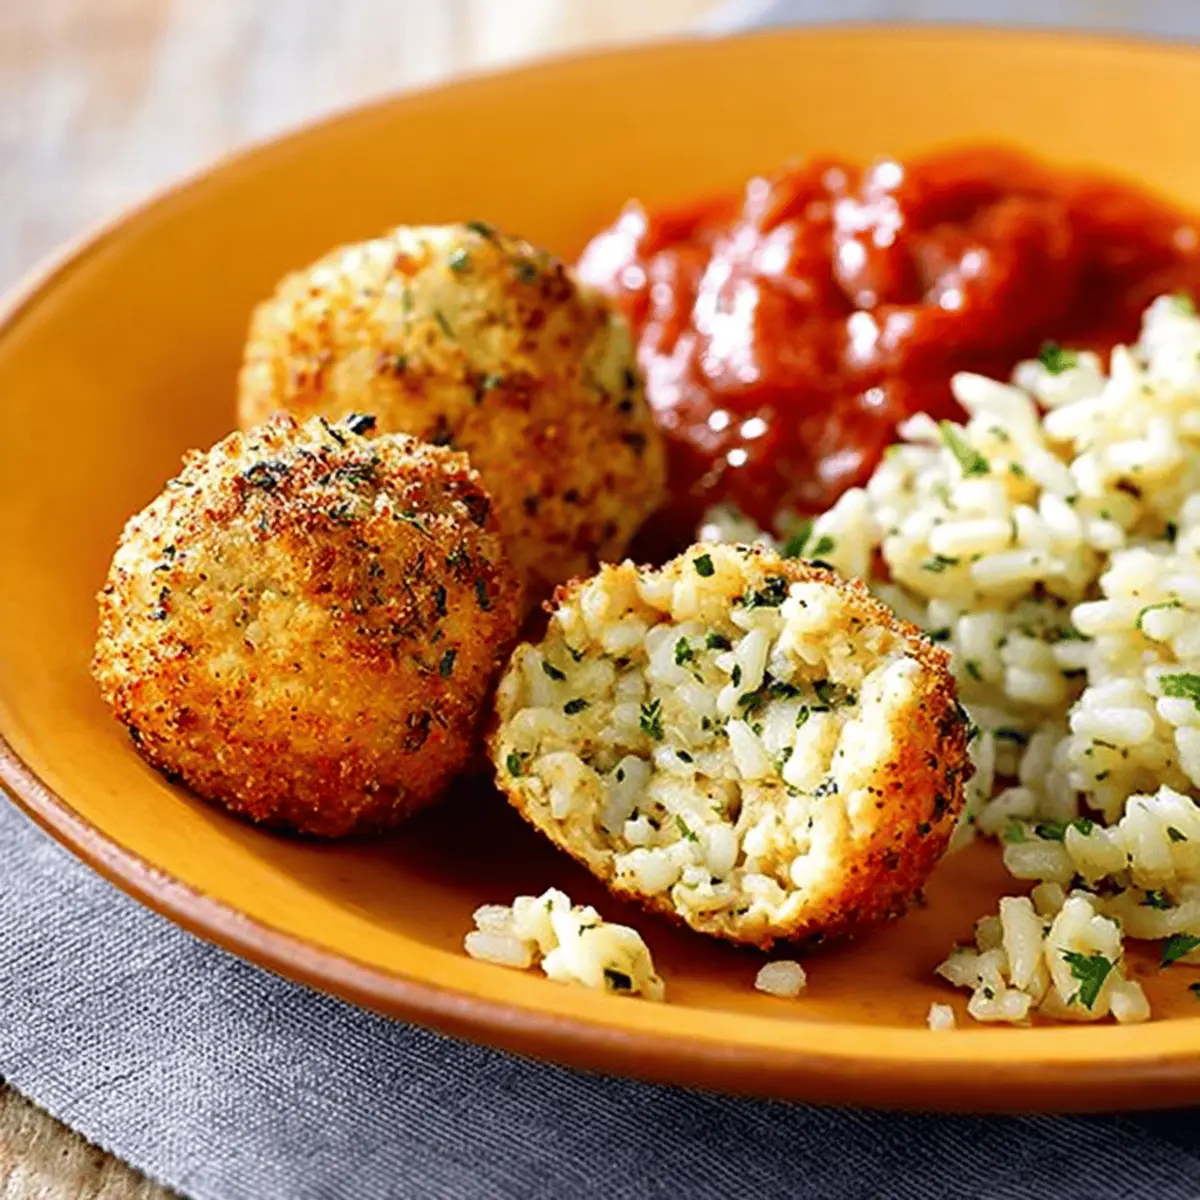
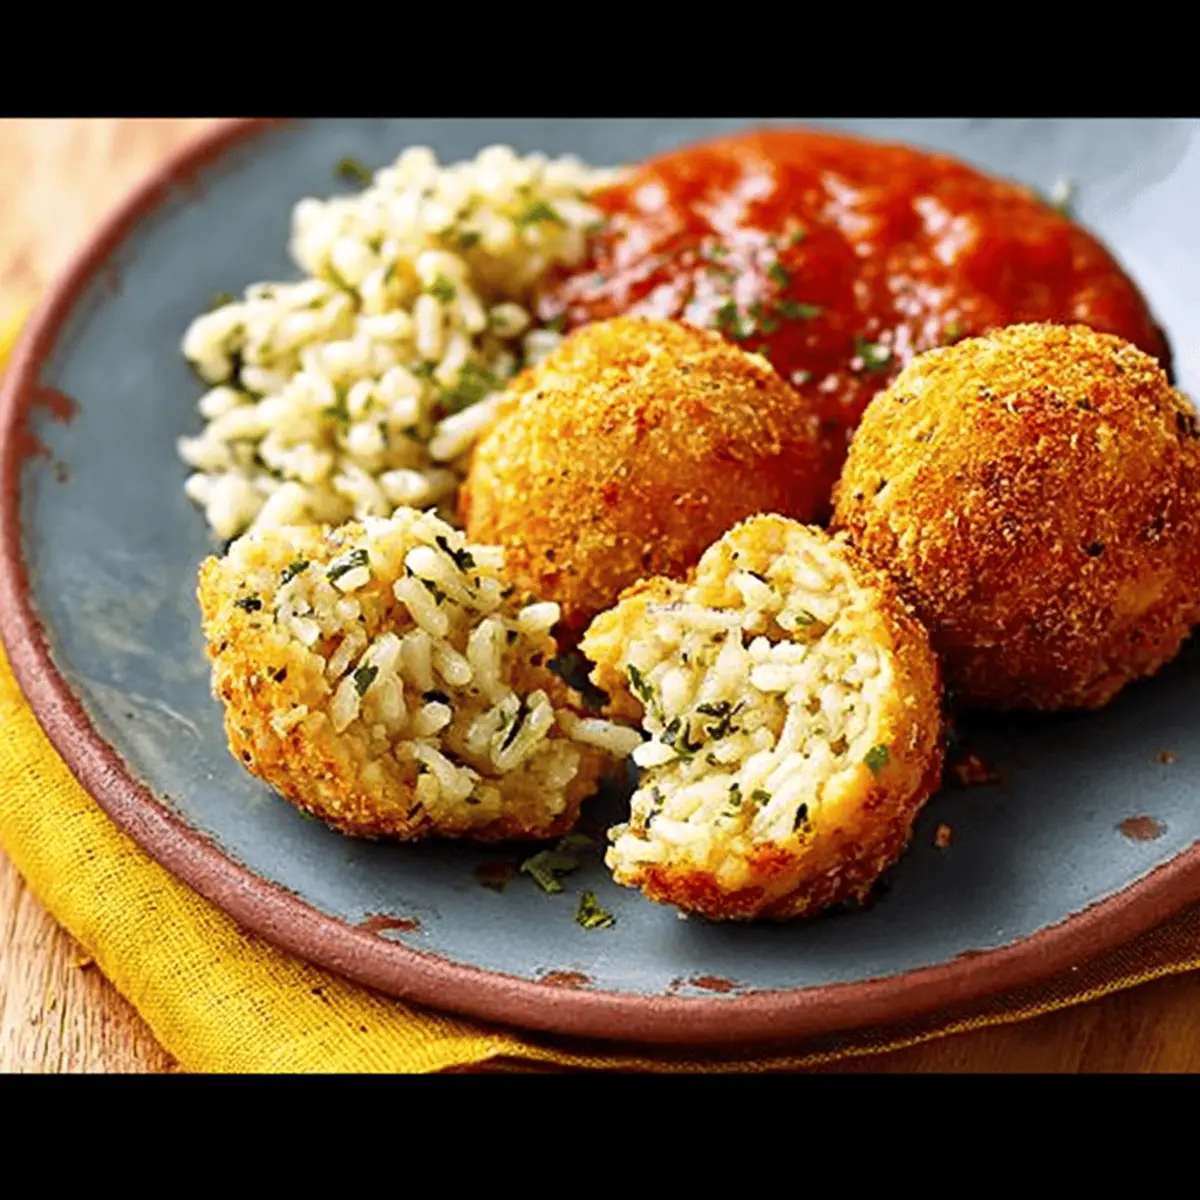
Bake until golden brown and delicious
Now that everything is in place, it’s time to put your Baked Chickpea and Rice Balls in the oven. Bake them for about 25-30 minutes, until they are golden brown. A good tip is to flip them halfway through to ensure they cook evenly.
While you wait, consider making a dipping sauce or a fresh salad to complete your meal. These savory little bites are not only great on their own but pair beautifully with a yogurt or tahini sauce for an added flavor kick.
And there you have it! Your Baked Chickpea and Rice Balls are ready to be enjoyed. These make for a perfect meal prep option, and I guarantee you’ll be reaching for seconds!
Variations on Baked Chickpea and Rice Balls
Baked Chickpea and Rice Balls are incredibly versatile and can easily adapt to different cuisines. Let’s explore three delightful variations that can elevate your snacking game.
Mediterranean-Inspired Rice Balls
Imagine sinking your teeth into a golden, crispy ball filled with the vibrant flavors of the Mediterranean. To create this variation, consider adding ingredients like crumbled feta cheese, diced sun-dried tomatoes, and fresh herbs such as oregano and parsley. This version pairs beautifully with a simple tzatziki sauce for dipping. Plus, it’s a fantastic way to incorporate more vegetables into your diet, as you can mix in finely chopped spinach or bell peppers. Discover more Mediterranean recipes here.
Spicy Mexican Chickpea and Rice Balls
For those who love a kick, spicy Mexican chickpea and rice balls will surely hit the spot! Incorporate ingredients like cumin, chili powder, and even some fresh jalapeños for heat. Feel free to substitute corn for a sweet crunch. These balls are perfect for dipping in guacamole or a tangy salsa. Bright, zesty, and utterly delicious, this variation is a fun way to bring new life to your snacking routine while sticking to wholesome ingredients.
Classic Italian-Style Chickpea and Rice Balls
You can’t go wrong with a classic! To model these baked chickpea and rice balls after Italian arancini, use a blend of Parmesan cheese, marinara sauce, and fresh basil. Adding a touch of garlic to your mixture will give it that unmistakable Italian flair. Try serving these warm with a side of marinara for extra flavor. Each bite delivers a combination of comfort and nostalgia, making them a favorite among friends and family.
With these variations, your baked chickpea and rice balls will never get boring!
Cooking Tips and Notes for Baked Chickpea and Rice Balls
Tips for Achieving the Best Texture
For perfectly baked chickpea and rice balls, texture is key! Here are some tips:
- Avoid sogginess: Allow your cooked rice and chickpeas to cool before mixing. This helps maintain structure.
- Use breadcrumbs: Incorporating breadcrumbs as a binder can give them that delightful crunch while keeping them light.
- Don’t over-mix: Gently combine the ingredients. Over-mixing can lead to a dense texture, which we want to avoid!
Notes on Seasoning and Flavoring
Spicing things up can make all the difference:
- Experiment with herbs: Fresh herbs like parsley or cilantro elevate flavor. Dried spices such as cumin or smoked paprika can add depth.
- Taste as you go: Always sneak a taste of the mixture before baking. Adjust salt, pepper, and spices to suit your palate. Check out more on seasoning from the Heritage Chef.
Storage Tips for Leftovers
Got leftovers? Here’s how to keep baked chickpea and rice balls fresh:
- Refrigerate: Place them in an airtight container for up to five days.
- Freezing: They freeze beautifully! Just ensure they’re cooled completely. Freeze them in a single layer, then store in a sealed bag for up to three months. For reheating, bake or air-fry directly from frozen for best results.
Serving Suggestions for Baked Chickpea and Rice Balls
Perfect pairings with dips and sauces
When it comes to enjoying your Baked Chickpea and Rice Balls, dipping sauces can elevate your experience. Consider serving them with:
- Tahini Dressing: This creamy, nutty sauce complements the flavors perfectly. A drizzle enhances the dish while offering healthy fats.
- Yogurt Sauce: A tangy yogurt dip infused with herbs like dill or mint adds a refreshing touch.
- Spicy Harissa: If you crave a kick, harissa brings out the spices in the chickpea and rice balls beautifully.
By mixing these dips, you maintain interest in each bite!
Creative side dishes to complement the main dish
Pairing is key! Here are creative side ideas that balance the flavors of your Baked Chickpea and Rice Balls:
- Quinoa Salad: Fresh veggies and a zingy lemon vinaigrette provide a light yet satisfying contrast.
- Roasted Vegetables: Think seasonal veggies like zucchini or bell peppers, drizzled with olive oil. They add color and texture.
- Couscous with Herbs: This fluffy side is a great way to soak up any sauce or dressing, making every bite complete.
These suggestions not only enhance your meal but also keep your dining experience exciting and vibrant! For more tips on healthy meal pairings, check out Nutrition.gov for inspiration.
Time Breakdown for Baked Chickpea and Rice Balls
Preparation Time
Getting your ingredients ready doesn’t take long! You’ll need about 10-15 minutes to chop veggies, measure spices, and combine everything in a bowl. If you’re in a hurry, consider prepping your chickpeas the night before.
Cooking Time
Once those delicious ingredients are mixed, it’s time to pop them in the oven. The baking will take around 20-25 minutes until they’re golden and crispy. Keep an eye on them for that perfect crunch!
Total Time
In total, you’re looking at about 30-40 minutes from start to finish. Perfect for a speedy weeknight dinner or a nutritious snack! If you want to learn more about quick meal ideas, check out Healthy Eating for inspiration. Remember, these baked chickpea and rice balls are not just tasty; they’re a great source of plant-based protein!
Nutritional Facts for Baked Chickpea and Rice Balls
When it comes to healthy snacking, Baked Chickpea and Rice Balls are a fantastic option. Here’s a closer look at their nutritional profile:
Calories
These delightful bites pack around 150 calories per serving, making them a satisfying yet guilt-free treat. Ideal for mid-afternoon munching or a light dinner, they provide energy without heavy calories.
Protein
One of the star features of Baked Chickpea and Rice Balls is their impressive protein content—about 7 grams per serving! This makes them a great choice for vegetarians wanting to boost their protein intake. Chickpeas are particularly renowned for their protein profile, contributing essential amino acids to your diet.
Fiber
These tasty balls are rich in dietary fiber, with about 5 grams per serving. This not only aids digestion but also keeps you full longer, which is perfect for busy professionals on the go. According to Healthline, increasing your fiber intake can support heart health and weight management.
Incorporating Baked Chickpea and Rice Balls into your meals will not only delight your taste buds but also provide essential nutrients that support a balanced lifestyle. So next time you’re looking for a healthy snack, remember these little powerhouses!
FAQs about Baked Chickpea and Rice Balls
Can I freeze baked chickpea and rice balls?
Absolutely! Freezing your baked chickpea and rice balls is a fantastic way to enjoy a nutritious snack later. After baking, let them cool completely. Then, place them in an airtight container or a freezer bag. They can last for up to three months in the freezer. When you’re ready to enjoy them, simply reheat in the oven at 350°F (175°C) for about 15-20 minutes or until heated through. This not only saves time but also reduces food waste!
How can I spice up the flavors?
If you’re looking to elevate the taste of your baked chickpea and rice balls, consider experimenting with different spices and herbs. Here are some ideas to get you started:
- Cumin and Coriander: These give a warm, earthy flavor.
- Smoked Paprika: Adds a subtle smokiness that pairs beautifully with chickpeas.
- Fresh Herbs: Chopped parsley, cilantro, or basil can brighten the dish.
- Red Pepper Flakes: For those who enjoy a bit of heat, adding a pinch can really kick things up a notch.
Feel free to get creative based on what you have in your pantry!
What are some good dipping sauces?
Pairing your baked chickpea and rice balls with a delicious dipping sauce can enhance your snacking experience. Here are some crowd-pleasers:
- Tahini Sauce: Creamy and nutty, it complements the chickpeas perfectly.
- Yogurt Dip: Mix Greek yogurt with garlic and dill for a refreshing option.
- Spicy Sriracha Mayo: A zesty blend that adds a fun kick.
- Hummus: Traditional, yet always a win with chickpeas!
By incorporating these sauces, you’ll find your baked chickpea and rice balls becoming the star of any gathering. For extra inspiration, check out this guide on chickpea recipes for more ideas!
Conclusion on Baked Chickpea and Rice Balls
Baked Chickpea and Rice Balls are not just a delightful snack; they’re a nutritional powerhouse! Packed with fiber, protein, and essential vitamins, these balls are a satisfying option for lunch or dinner. The crispy exterior, paired with a tender inside, delivers a flavor that even picky eaters will love. Not to mention, by preparing these at home, you’re in control of which ingredients go in!
Imagine enjoying these with a zesty dip or atop a fresh salad. For more inspiration on using chickpeas, check out sources like Healthline or Nutritiondata, which delve into their health benefits. Next time you’re in need of a quick and nutritious meal, these Baked Chickpea and Rice Balls are waiting to impress!
PrintBaked Chickpea and Rice Balls: Irresistibly Flavorful Bites

Baked Chickpea and Rice Balls are delicious, healthy bites packed with flavor, perfect as a snack or party appetizer.
- Prep Time: 15 minutes
- Cook Time: 30 minutes
- Total Time: 45 minutes
- Yield: 4 servings 1x
- Category: Appetizers
- Method: Baking
- Cuisine: Mediterranean
- Diet: Vegetarian
Ingredients
- 1 can chickpeas, drained and rinsed
- 1 cup cooked rice
- 1/2 cup breadcrumbs
- 1/4 cup grated Parmesan cheese
- 1 egg
- 2 tablespoons olive oil
- 1 teaspoon garlic powder
- 1 teaspoon onion powder
- 1 teaspoon paprika
- 1/2 teaspoon salt
- 1/4 teaspoon black pepper
Instructions
- Preheat the oven to 400°F (200°C).
- In a large bowl, mash the chickpeas with a fork or potato masher.
- Add the cooked rice, breadcrumbs, Parmesan cheese, egg, olive oil, garlic powder, onion powder, paprika, salt, and black pepper. Mix until well combined.
- Form the mixture into small balls and place them on a baking sheet lined with parchment paper.
- Bake for 25-30 minutes or until golden brown, flipping halfway through.
- Serve warm with your favorite dipping sauce.
Notes
- For a vegan option, replace the egg with a flax egg.
- Feel free to customize the spices according to your taste.
Nutrition
- Serving Size: 6 balls
- Calories: 150
- Sugar: 1g
- Sodium: 200mg
- Fat: 7g
- Saturated Fat: 2g
- Unsaturated Fat: 4g
- Trans Fat: 0g
- Carbohydrates: 19g
- Fiber: 4g
- Protein: 5g
- Cholesterol: 20mg
Keywords: Baked Chickpea and Rice Balls, healthy snacks, appetizers, vegetarian recipes