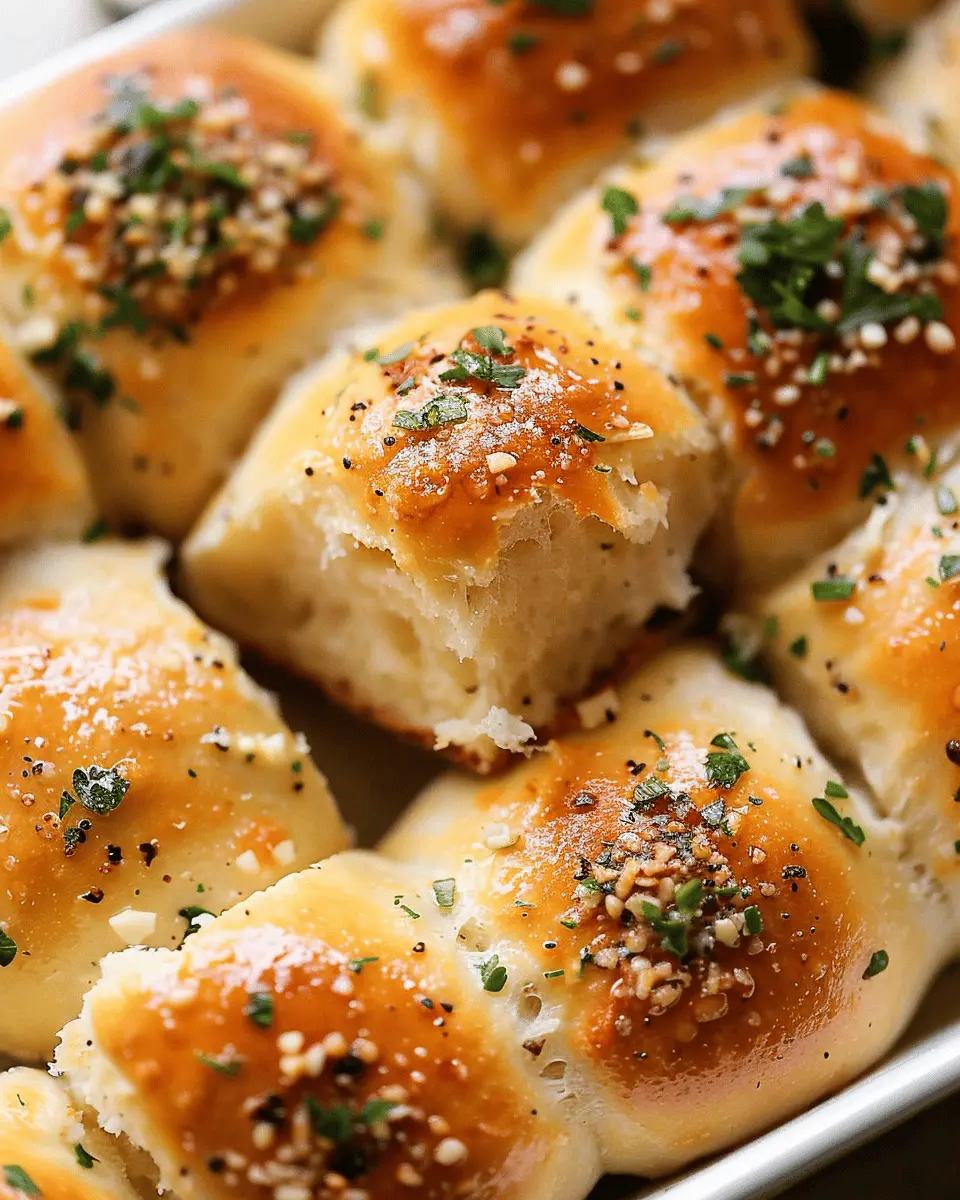
Introduction to Garlic Bread Rolls
When thinking about comfort food that also serves as a crowd-pleaser, garlic bread rolls come to mind. They are the perfect accompaniment to many dishes, from pastas to salads. As a young professional juggling work and personal life, the last thing you want is to spend hours in the kitchen. Enter these aromatic, buttery delights that can elevate any meal without requiring culinary expertise.
Why Garlic Bread Rolls are a Must-Try for Young Professionals
For busy individuals, efficiency is key. Garlic bread rolls check that box effortlessly. They are not only simple to prepare but also incredibly versatile. Whether you’re hosting a casual dinner party or just looking to impress a date, these rolls will have everyone reaching for more. Did you know that the average young professional spends about 10 hours a week cooking? It’s not a massive time suck, but finding quick, rewarding recipes can make all the difference. Garlic bread rolls can fit right into that window.
Imagine this: after a long day, you return home, and the aroma of freshly baked garlic bread rolls fills your kitchen. A quick roll in the oven and your home smells like a charming Italian bistro. You can enjoy these rolls with anything from steaming bowls of beef chili to hearty vegetable soups. By mixing in flavors like fresh herbs or cheese, you can easily customize your rolls to suit your taste.
Moreover, these rolls are a hit at social gatherings. Picture a cozy evening with friends where you take the lead as the star chef by serving homemade garlic bread rolls. They’ll be charmed by your culinary prowess, and you’ll get to enjoy the social perks that come with food—like laughter and meaningful conversations.
If you want to learn more about the health benefits of garlic, check out the Healthline article on its numerous advantages.
So, whether you’re cooking for yourself or entertaining friends, let garlic bread rolls be your trusted companion in the kitchen. They promise to be a delightful addition to your meals and a wonderful way to unwind after a hectic day. Let’s dive into the recipe!
Ingredients for Garlic Bread Rolls
Essential ingredients for perfect rolls
Creating mouthwatering garlic bread rolls starts with the right foundations. You’ll need:
- All-purpose flour: This is the backbone for your rolls. A good quality flour ensures light and fluffy texture.
- Yeast: Active dry yeast gives your rolls that lovely rise. Check the expiration date for perfect results.
- Warm water: The warm water activates the yeast—aim for around 110°F (43°C).
- Sugar: Just a touch to feed the yeast and enhance the flavor profile.
- Salt: Essential for taste, but be careful not to overdo it; too much can inhibit yeast activity.
- Butter: Melted, it adds richness to your dough and creates that golden crust.
- Garlic: Freshly minced or even roasted, it’s what makes these rolls irresistibly fragrant.
Optional additions for extra flavor
Want to elevate your garlic bread rolls even more? Consider these optional ingredients:
- Parmesan cheese: Sprinkle some into the dough for a cheesy infusion.
- Herbs: Fresh parsley or oregano can add a refreshing note.
- Turkey bacon or Chicken ham: Mix in bits for a savory twist; a delightful surprise inside!
Feeling inspired? Check out more about baking techniques on King Arthur Baking for tips and tricks to perfect your rolls!
Step-by-Step Preparation for Garlic Bread Rolls
Garlic bread rolls are the perfect combination of comfort food and impressive party starter. Not only do they fill your home with an irresistible aroma, but they also pair beautifully with pasta, soups, or can be enjoyed on their own. Whether you’re entertaining guests or simply treating yourself, making your own garlic bread rolls is definitely worth the effort. Let’s walk through the process together, step by step.
Gather and Measure Your Ingredients
Before diving into the cooking, it’s essential to gather all the ingredients you’ll need. This minimizes stress and helps everything come together smoothly. Here’s what you’ll require:
-
For the dough:
-
3 cups all-purpose flour
-
1 packet (2 1/4 teaspoons) active dry yeast
-
1 teaspoon salt
-
1 tablespoon sugar
-
1 cup warm water (about 110°F)
-
2 tablespoons olive oil
-
For the garlic butter:
-
1 cup unsalted butter, softened
-
6-8 cloves fresh garlic, minced (adjust according to preference)
-
Fresh parsley, chopped (for garnish)
It’s helpful to measure them out beforehand, so you’re not scrambling mid-recipe. Plus, precision ensures a consistent end product—no one wants a flop when they’re aiming for perfect garlic bread rolls!
Prepare the Garlic Butter Mixture
While your yeast activates, you can prepare the garlic butter. In a medium bowl, mix softened butter, minced garlic, and parsley together until well combined. This blend adds a punch of flavor that will infuse into every bite of your garlic bread rolls.
Pro tip: If you’re a fan of a bit of heat, include a pinch of red pepper flakes. It adds an extra layer of flavor that takes these rolls from good to great.
Mix Dry Ingredients with Wet Ingredients
Once the yeast is bubbly (let it sit in warm water mixed with sugar for about 5-10 minutes), it’s time to combine the dry and wet ingredients. In a large mixing bowl, combine the flour, salt, and active dry yeast mixture. Give it a good stir until everything is just combined.
This step can be messy, but that just means you’re getting your hands in there—don’t shy away from it!
Knead the Dough to the Perfect Consistency
Turn the dough onto a floured surface and knead it for about 10 minutes. You’re looking for a smooth, elastic texture. If the dough sticks to your hands too much, sprinkle a bit more flour as needed; just avoid adding too much, as it can make your bread dense.
Kneading is where the magic happens; it develops the gluten, which gives the rolls that wonderful, chewy texture.
Shape and Let the Dough Rise
Once the dough is kneaded, form it into a ball and place it in a lightly greased bowl. Cover with a clean kitchen towel and let it rise in a warm, draft-free area for about 1 hour or until it has doubled in size.
Letting it rise is crucial—this is what transforms the dough into airy, fluffy rolls.
Preheat Your Oven and Prepare for Baking
About 15 minutes before your dough is ready, preheat your oven to 375°F (190°C). While it’s warming up, punch down the dough to release the air and shape it into small rolls, placing them on a greased or parchment-lined baking sheet.
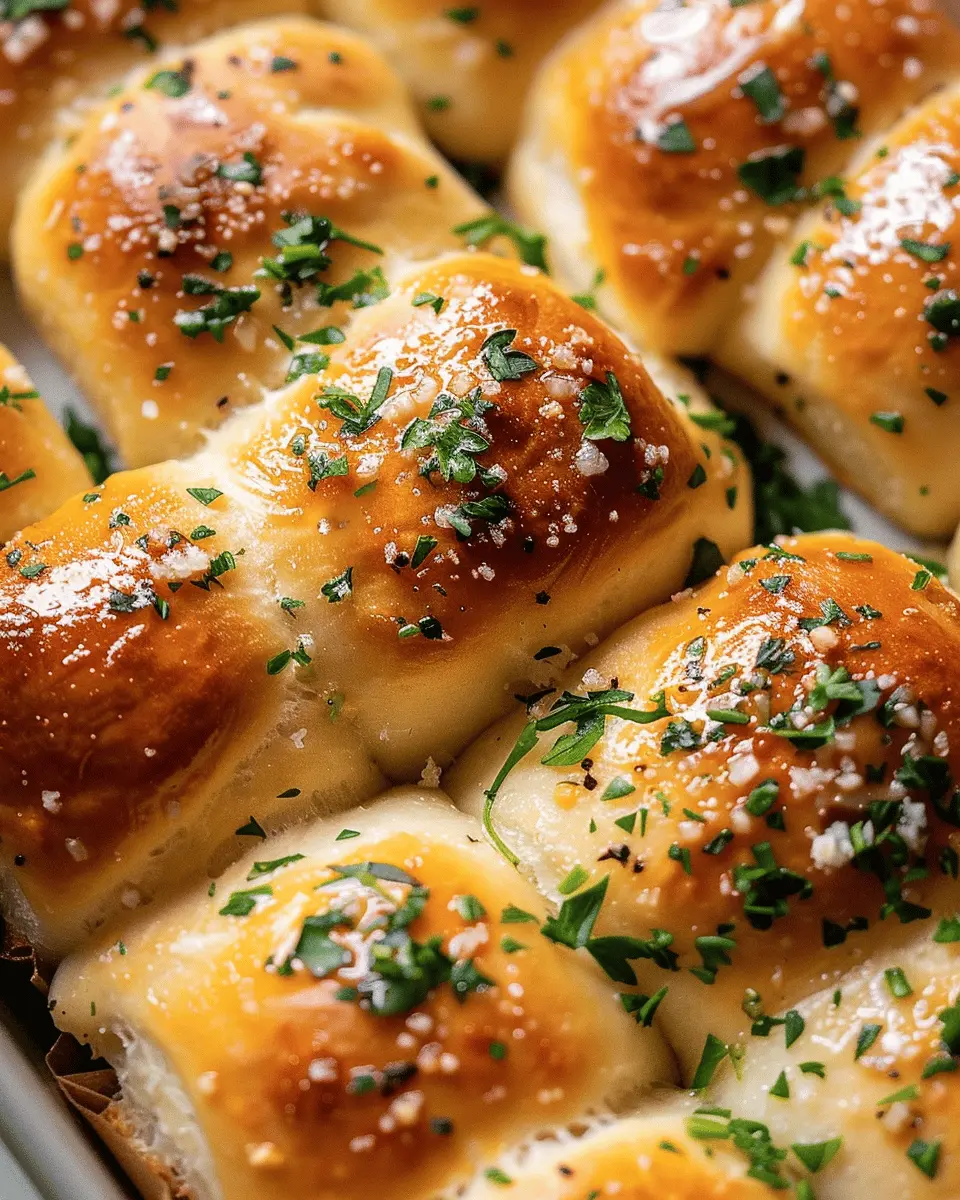
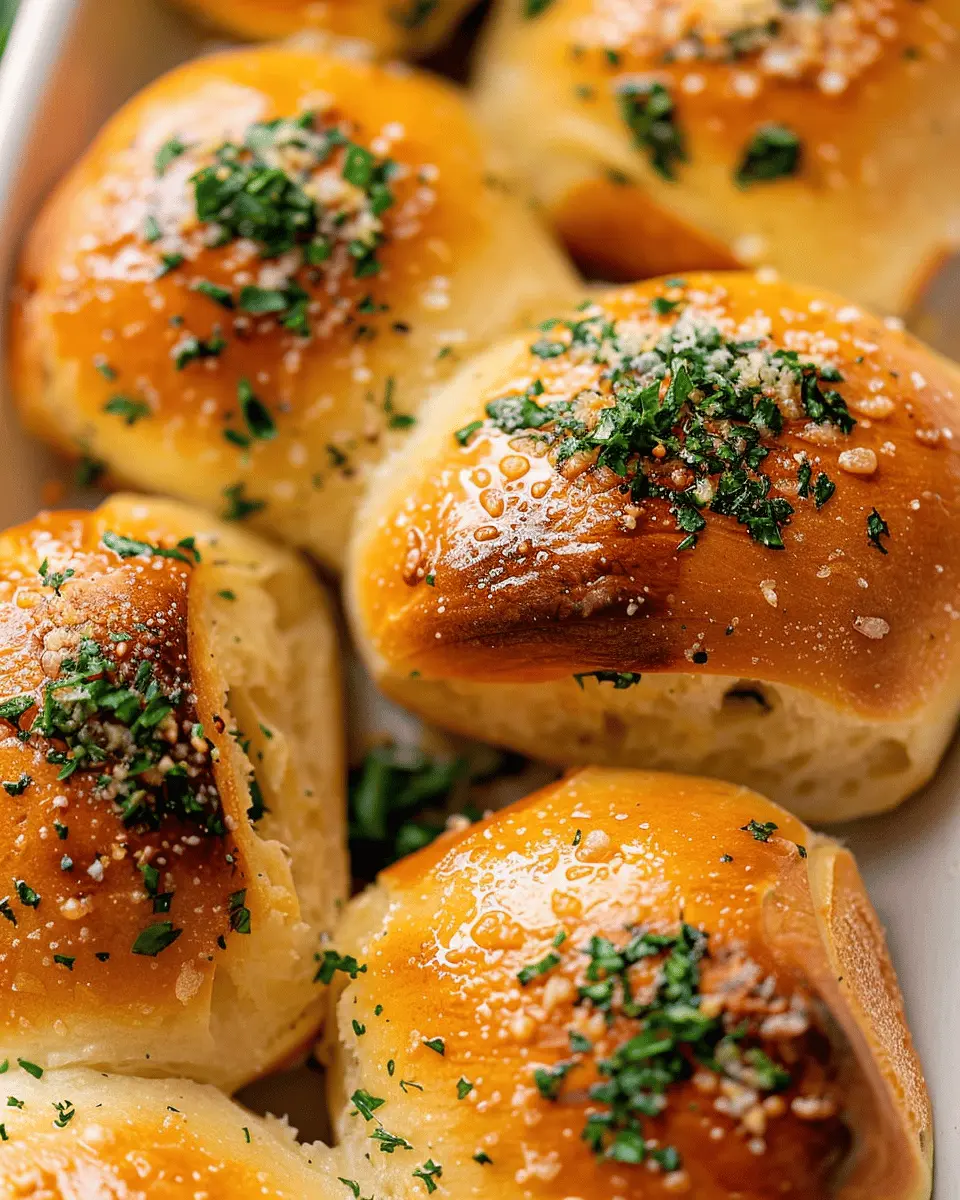
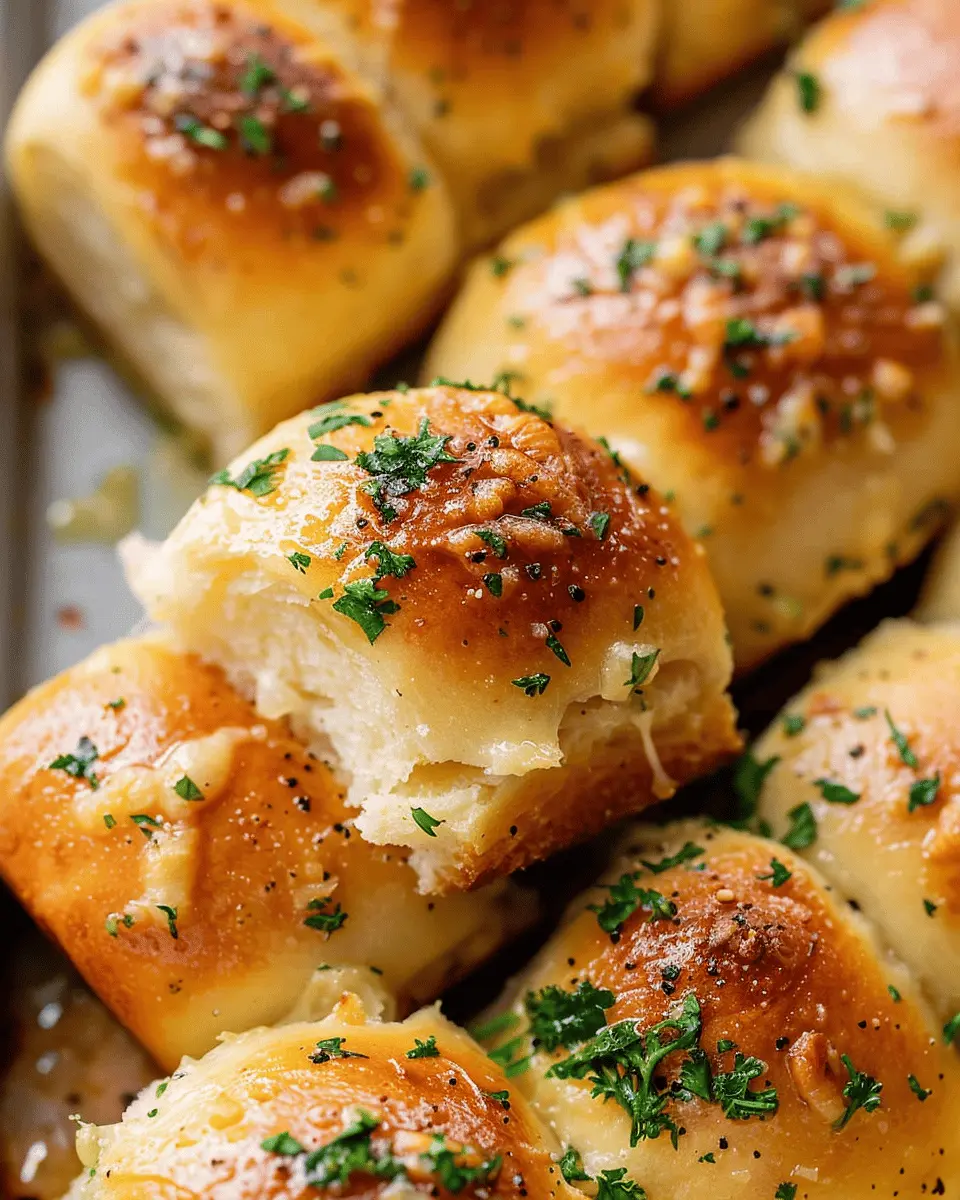
Bake the Rolls and Prepare Garlic Butter Topping
Bake the rolls for around 20-25 minutes, or until they are golden brown. During the final moments of baking, melt the remaining garlic butter you prepared earlier. As soon as your rolls come out of the oven, brush them with this delicious garlic butter mixture to give them a glossy finish.
Once they’re cooled slightly, they’re ready to serve. You’ll find that these garlic bread rolls will disappear just as quickly as you made them! Enjoy these warm, savory delights with your favorite meal or as a snack.
For more delicious recipes and tips on baking, check out BBC Good Food for a treasure trove of culinary inspiration!
Variations on Garlic Bread Rolls
Garlic bread rolls are a beloved comfort food that can easily transform into a variety of delightful creations. If you’ve mastered the basic recipe, why not take a culinary adventure with some tasty variations?
Herb-Infused Garlic Rolls
Imagine rolling fresh herbs like rosemary, thyme, and parsley into your dough before baking! These herb-infused garlic bread rolls not only elevate the flavor but also give your rolls a vibrant green hue. The combination of garlic and herbs creates a fragrant aroma that may even draw some compliments from dinner guests. For a more detailed exploration of herb pairings, check out this Herb Gardening Guide.
Cheese-Stuffed Garlic Bread Rolls
Who doesn’t love cheese? Stuffing your garlic rolls with gooey cheese can take them to the next level. Try using mozzarella or fontina for a melty surprise in each bite. You can even sprinkle some parmesan on top before baking for an extra crunch. Just imagine pulling apart a roll to reveal that melted goodness inside. It’s the kind of dish that will surely impress your friends during a game night!
Spicy Garlic Rolls with Jalapeños
For those who crave a little heat, spicy garlic rolls with fresh jalapeños are an exciting twist. Sauté jalapeños with your garlic for a couple of minutes to release their flavor, then fold them into the dough. Not only will they add a kick, but they also offer a unique texture that stands out against the fluffy backdrop of those garlic rolls. You might find yourself coming back for more!
With these variations on garlic bread rolls, you can mix things up and keep your meals exciting. Remember, food should be fun and a little creative!
Cooking Tips and Notes for Garlic Bread Rolls
Common pitfalls and how to avoid them
Making garlic bread rolls can be deceptively simple, but there are some common mistakes to watch for. One is overworking the dough, which can lead to tough rolls. Remember, mix just until ingredients are combined. Also, pay attention to your oven temperature; an overly hot oven can burn the rolls before they’re fully baked. For guidance on proper baking temperatures, you can refer to Serious Eats for tips on bread baking.
Tips for making rolls soft and fluffy
To ensure your garlic bread rolls are fluffy, consider these tips:
- Use warm water (about 110°F) to activate the yeast effectively.
- Adding a touch of milk can enrich the dough and improve texture.
- Don’t skip kneading! It develops gluten, creating the desirable soft texture.
- For extra fluffiness, allow the rolls to rise until doubled in size—patience is key!
Storage tips for leftover rolls
If there are any garlic bread rolls left (which might be rare!), store them in an airtight container at room temperature for up to two days. For longer storage, freeze them wrapped in plastic wrap and foil. Just pop them in the oven for a few minutes to refresh their texture and flavor when you’re ready to enjoy them again!
For more storage advice and tips on bread preservation, check out King Arthur Baking.
Serving Suggestions for Garlic Bread Rolls
Perfect Pairings for Garlic Bread Rolls
When you think of garlic bread rolls, what comes to mind? These delectable rolls are the ideal sidekick for a variety of dishes. They pair wonderfully with:
- Classic pasta dishes: From spaghetti marinara to creamy fettuccine Alfredo, the buttery flavor complements rich sauces beautifully.
- Soups and salads: Serve them alongside a hearty minestrone or a crisp Caesar salad for a satisfying meal.
- Grilled meats: Think roasted chicken or beef steaks—these rolls add a delightful touch to the plate.
Creative Serving Ideas for Gatherings
Looking to impress at your next gathering? Here are a few fun ways to serve garlic bread rolls:
- Sharing platter: Arrange your rolls on a wooden board with dips like olive oil and balsamic vinegar for a rustic feel.
- Mini sandwiches: Slice the rolls open and fill them with turkey bacon, chicken ham, or fresh veggies for quick bites.
- Appetizer bites: Cut the rolls into bite-sized pieces, serve with a marinara dip for a crowd-pleasing starter.
With these suggestions, your garlic bread rolls will be the star of your next meal or event! For more ideas, explore resources like Food Network or Bon Appétit.
Time Breakdown for Garlic Bread Rolls
Planning to whip up some mouthwatering garlic bread rolls? Here’s how to allocate your time effectively:
Preparation Time
Getting everything ready takes about 20 minutes. This includes mixing your ingredients and shaping the rolls. Make sure to gather your fresh garlic, butter, and herbs for that delightful flavor!
Rising Time
Patience is key! Allow the dough to rise for approximately 1 hour. This is when the magic happens, transforming your dough into soft and fluffy rolls. A warm kitchen will do wonders for rising.
Baking Time
The baking process will take approximately 15-20 minutes. You’ll want them golden brown, giving off that incredible aroma that fills your home.
Total Time
In total, you’re looking at roughly 1 hour 40 minutes from start to finish. Perfect for a warm, comforting side dish that pairs beautifully with a salad or pasta!
For more tips on kneading techniques and ingredient choices, you can check out sources like King Arthur Baking or The Spruce Eats. Enjoy making these delicious garlic bread rolls!
Nutritional Facts for Garlic Bread Rolls
When it comes to delicious snacks or sides, garlic bread rolls often top the list. But how do they fit into your diet? Let’s break it down!
Calories per roll
Each garlic bread roll contains roughly 150 calories. This makes them a perfect option for an indulgent treat without overdoing it. If you’re watching your calorie intake, it’s easy to enjoy one or two rolls as part of a balanced meal.
Carbohydrates and protein content
These rolls generally pack about 25 grams of carbohydrates and 4 grams of protein each. While they’re not protein powerhouses, they provide the energy needed to keep you going. Consider pairing them with a protein-rich dish like grilled chicken to enhance your meal.
Fat content and dietary considerations
With approximately 6 grams of fat, garlic bread rolls can fit into varied diets. That being said, if you’re monitoring your fat intake or following a specific dietary plan, you might want to adjust your portion size. Consider using olive oil instead of butter when preparing the rolls for a healthier fat option.
For more detailed nutritional information, the USDA nutritional database is an excellent resource for understanding specific ingredients you may want to include or avoid.
So next time you’re whipping up a batch of those mouthwatering garlic bread rolls, you can enjoy them without guilt—just remember moderation is key!
FAQ about Garlic Bread Rolls
What if I don’t have instant yeast?
No instant yeast? No problem! You can easily substitute it with active dry yeast. Just dissolve it in warm water (110°F or so) with a little sugar and let it sit for about 5–10 minutes until it’s foamy. This step activates the yeast and ensures your garlic bread rolls rise beautifully. Remember, patience is key when waiting for dough to double in size!
Can I make these rolls ahead of time?
Absolutely! If you’re planning a gathering or want to meal prep, you can make your garlic bread rolls ahead of time. Prepare the dough, let it rise, and shape the rolls. Instead of baking them, cover and refrigerate them for up to 24 hours. When you’re ready to bake, just let them come to room temperature and rise a bit more before popping them in the oven. You’ll have freshly baked rolls without the rush!
How can I customize the flavors?
One of the best things about garlic bread rolls is how adaptable they are! Here are a few ideas to personalize your rolls:
- Herbs: Mix in chopped fresh parsley, basil, or oregano to add a burst of freshness.
- Cheese: Incorporate some shredded mozzarella or parmesan into the dough or sprinkle on top before baking for a cheesy twist.
- Spices: A pinch of red pepper flakes or smoked paprika could add a delightful kick.
Feel free to explore other flavor combinations; don’t be afraid to experiment! If you have favorites in mind, let me know how they turned out. Happy baking!
For more tips on baking, visit King Arthur Baking for fantastic resources.
Conclusion on Garlic Bread Rolls
Recap of the Joys of Homemade Garlic Bread Rolls
In this whirlwind of flavors, homemade garlic bread rolls truly steal the show. The comforting aroma as they bake brings a wave of nostalgia, reminding us of cozy family dinners and gatherings with friends. There’s something incredibly satisfying about creating these rolls from scratch—watching them rise and turn golden brown in the oven is a joy in itself.
Not only are they delightful on their own, but they also pair perfectly with soups, pastas, and even salads. By experimenting with variations like adding herbs or cheese, you can elevate your garlic bread rolls to a whole new level. Why not try serving them with a tangy marinara sauce next time? The possibilities are endless!
So roll up your sleeves, embrace the art of bread-making, and give yourself the gift of delicious homemade garlic bread rolls. You won’t regret it! For more inspiration on tasty bread ideas, check out King Arthur Baking or Food52 for delightful recipes and tips!
PrintGarlic Bread Rolls: Easy Homemade Delights for Any Meal
These Garlic Bread Rolls are the perfect accompaniment to any meal, offering a deliciously buttery and garlicky flavor that everyone will love.
- Prep Time: 15 minutes
- Cook Time: 20 minutes
- Total Time: 1 hour 35 minutes
- Yield: 12 rolls 1x
- Category: Bread
- Method: Baking
- Cuisine: Italian
- Diet: Vegetarian
Ingredients
- 2 cups all-purpose flour
- 1 teaspoon salt
- 1 tablespoon sugar
- 1 teaspoon dried yeast
- 1/2 cup warm water
- 1/4 cup unsalted butter
- 2 cloves garlic, minced
- 1/4 cup fresh parsley, chopped
Instructions
- In a bowl, mix together flour, salt, sugar, and yeast.
- Add warm water and mix until a dough forms.
- Knead the dough for 5-7 minutes until smooth.
- Let the dough rise in a warm place for about 1 hour.
- Preheat the oven to 375°F (190°C).
- Melt butter in a pan, add garlic and parsley, and sauté for 2 minutes.
- Shape the dough into rolls and place in a baking dish.
- Brush the rolls with the garlic butter mixture.
- Bake for 15-20 minutes until golden brown.
Notes
- For extra flavor, add grated cheese on top before baking.
- These rolls are best served warm.
Nutrition
- Serving Size: 1 roll
- Calories: 150
- Sugar: 1g
- Sodium: 200mg
- Fat: 7g
- Saturated Fat: 4g
- Unsaturated Fat: 2g
- Trans Fat: 0g
- Carbohydrates: 18g
- Fiber: 1g
- Protein: 3g
- Cholesterol: 15mg
Keywords: Garlic Bread Rolls