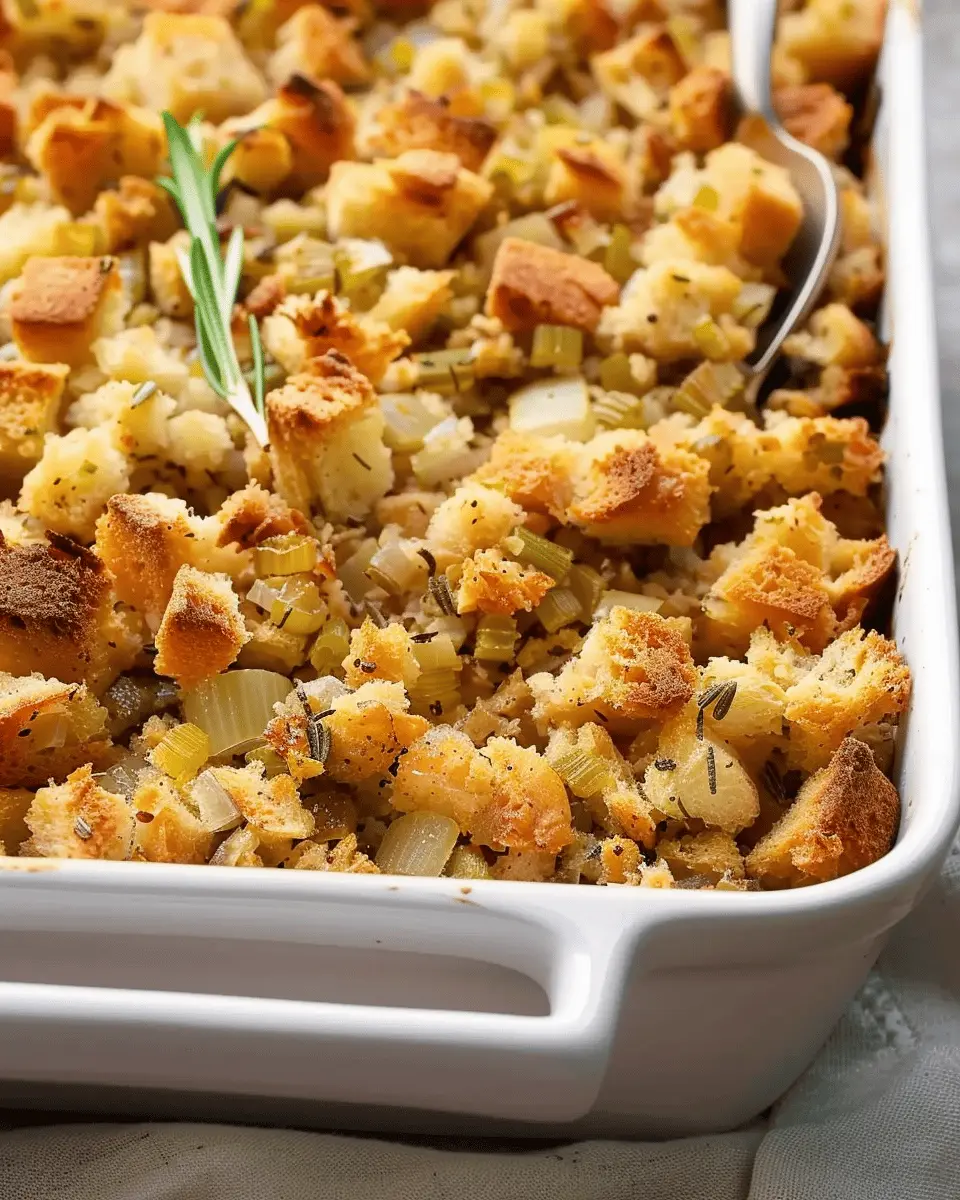
Introduction to Make-Ahead Classic Stuffing
When the holidays roll around, young professionals find themselves juggling countless responsibilities. Between work deadlines, social commitments, and a busy personal life, creating a festive meal can feel like an overwhelming task. That’s where make-ahead classic stuffing comes into play—an absolute game changer that allows you to savor the season without sacrificing your time or energy.
Imagine this: You’re hosting a gathering, and the aroma of freshly baked stuffing fills your home. Guests are impressed, compliments are flowing, and you can actually enjoy the moment instead of being stuck in the kitchen. By preparing your classic stuffing a day in advance, you’re not only saving precious time but also reducing the day-of stress that often comes with cooking.
Why Make-Ahead Stuffing Is a Game Changer for Young Professionals
In a world where time is your most valuable resource, embracing make-ahead meals can change the way you approach holiday cooking. Here’s why this method is absolutely indispensable:
- Efficiency: Prepare your stuffing the day before, and all you need to do on cooking day is pop it in the oven. This allows you to focus on other aspects of the meal—like that roast chicken—that require your attention.
- Flavor Development: Preparing your stuffing in advance lets the flavors meld together beautifully. This means a tastier dish that you’ll be proud to serve at your holiday table. According to culinary experts, many dishes actually taste better the next day!
- Less Stress: With your stuffing already prepared, you’ll have more mental bandwidth to enjoy festivities or even join a yoga class to unwind. When you invest a little extra effort upfront, you reap the benefits later.
So, the next time you’re planning a holiday gathering, think about making classic stuffing a highlight of your prep. Your sanity—and your guests—will thank you! For even more culinary inspiration, check out resources like Epicurious and the Food Network, where you can find expert tips on festive cooking.
Why not take this holiday season from rushed to relaxed? With make-ahead classic stuffing, you can embrace the spirit of the season fully and deliciously!
Ingredients for Make-Ahead Classic Stuffing
When it comes to holiday cooking, having a delicious make-ahead classic stuffing ready to go can save you time and stress. Here’s what you’ll need for this savory side dish that will impress your guests:
- Bread Cubes: Use a mix of day-old white and whole grain bread, about 8 cups total. This gives your stuffing great texture while soaking up all the flavors.
- Turkey Bacon: Add in approximately 6-8 strips, diced. This smoky flavor will take your stuffing to another level.
- Chicken Ham: Incorporate about 1 cup, diced; this adds a subtle sweetness that balances the earthy flavors.
- Onions and Celery: Chop up 1 large onion and 2-3 celery stalks to provide that classic aromatic base.
- Herbs: Fresh thyme, sage, and parsley (about 2 tablespoons each) are essential for depth of flavor.
- Broth: Approximately 2-4 cups of low-sodium chicken or vegetable broth, depending on how moist you like your stuffing.
- Seasoning: A pinch of salt and pepper to taste.
These ingredients come together effortlessly, creating a stuffing that not only enhances your meal but can also be prepared ahead of time. Make sure to check out this guide for tips on using leftover bread.
Step-by-Step Preparation of Make-Ahead Classic Stuffing
Preparing make-ahead classic stuffing is not just about creating a delicious side dish; it’s about elevating your holiday culinary experience while saving you precious time. Here’s a detailed walkthrough to help you master this dish effortlessly.
Gather All Ingredients
The first step to crafting your stuffing is ensuring you have everything you need. Here’s what you’ll want to have on hand:
- Bread crumbs: Day-old bread works best, whether it’s sourdough, white, or a mix.
- Butter: Unsalted is preferred for better control over seasoning.
- Aromatics: Onion and celery are the essentials. Feel free to throw in some garlic and herbs like thyme or sage for added flavor.
- Turkey bacon or chicken ham: These provide a savory depth that makes your stuffing unforgettable.
- Chicken broth: This adds moisture and richness. Use low-sodium for better control over the salt.
- Seasonings: Salt, pepper, and any other favorite spices you like.
Having all your ingredients laid out not only streamlines the process but also creates a visual reminder of the deliciousness to come.
Melt the Butter
Next up, let’s get that butter melting. In a large skillet over medium heat, add about half a cup of butter—a little more if you like your stuffing extra rich. Allow it to melt completely and start to bubble slightly. This is where the magic begins! The aroma of melting butter will make your kitchen feel warm and inviting.
Cook the Aromatics
Once your butter is bubbling, it’s time to add the aromatics. Toss in diced onion and celery, stirring occasionally. Sauté them for about 5-7 minutes or until they soften and turn translucent. You can add minced garlic during the last minute of cooking to avoid burning. A quick tip: cook these until they’re just starting to caramelize for a deeper flavor.
According to The Kitchn, the base of onion and celery is more than tradition; it forms the foundation for a savory flavor.
If you’re adventurous, you could experiment by adding diced turkey bacon or chicken ham at this stage, allowing them to crisp up slightly in the buttery goodness.
Mix the Bread Crumbs and Seasonings
In a large mixing bowl, combine your bread crumbs with the sautéed mixture. Here’s where the seasoning joy comes in—add salt, freshly ground black pepper, and any herbs you love. Don’t be shy; mix it well so that every breadcrumb gets coated with flavor.
This step is key for creating a cohesive stuffing. The bread will absorb the flavors of the aromatics, making each bite a delicious experience.
Moisten with Chicken Broth
To bring your make-ahead classic stuffing together, gradually add chicken broth to the mixture while gently tossing. Start with about 1 to 1.5 cups, but don’t dump it all in at once! You want the stuffing to be moist, not soggy. The bread should adequately absorb the broth without falling apart. This is a personal touch—feel free to adjust the amount until you reach your desired consistency.
Cool and Store for Later Use
Now, let’s talk about storing this beauty! Once your stuffing is mixed and feels just right, transfer it to a greased or buttered baking dish. Cover tightly with plastic wrap and let it cool completely at room temperature. After it’s cooled, store it in the fridge for up to three days or freeze it for up to a month.
When you’re ready to serve, you can bake it directly from the fridge or freezer—just remember to adjust your baking time.
Taking the time to prep ahead means you’ll have more time for those holiday moments that matter most. So, gather your ingredients and start to create your make-ahead classic stuffing that everyone will rave about!
For further tips on enhancing your stuffing recipe, check out the Food Network.
Variations of Make-Ahead Classic Stuffing
Herb and Garlic Stuffing
If you’re dreaming of an aromatic twist to your make-ahead classic stuffing, consider adding fresh herbs and garlic. This variation infuses your stuffing with robust flavors, perfect for enhancing the turkey or chicken you’re serving. Simply sauté onions and garlic in olive oil until fragrant, then blend in a mix of fresh herbs such as rosemary, thyme, and parsley.
- Combine the herb mixture with cubed bread and a rich vegetable broth for moisture.
- For an extra depth of flavor, you can add in some roasted garlic or a sprinkle of Parmesan cheese.
- Let it sit overnight before baking to allow those beautiful flavors to meld.
Apple and Sausage Stuffing
Another delightful option is apple and sausage stuffing. By introducing sweet and savory elements, you create a stuffing that’s both unique and comforting. Use turkey bacon or beef sausage, and brown it in a pan to render the flavors. Then toss in diced apples for a sweet crunch and some chopped celery for that classic stuffing texture.
- Here, apple cider can serve as a fantastic alternative to broth, adding a beautiful sweetness.
- Incorporate walnuts or pecans for a nutty finish and don’t forget a sprinkle of cinnamon for warmth.
- This stuffing variation is excellent for fall gatherings and pairs beautifully with poultry dishes.
Whichever variation you choose, you’ll find that preparing your stuffing ahead not only saves you time but also elevates your holiday feasting experience. For more ideas on stuffing variations, check out this fantastic resource to keep your menu fresh and exciting!
Cooking Tips and Notes for Make-Ahead Classic Stuffing
Making make-ahead classic stuffing is a wonderful way to streamline your holiday meal. Here are some tips to ensure your stuffing is both delicious and stress-free!
Choose the Right Bread
- Use a combination of different breads like sourdough, whole grain, or even cornbread to add depth of flavor. Stale bread absorbs the broth better, so don’t hesitate to use leftover loaves!
Flavor Boosters
- Enhance your stuffing with sautéed vegetables such as onions, celery, and garlic. Adding herbs like sage or thyme can elevate the flavor profile significantly. These ingredients not only provide taste but also offer nutritional benefits—herbs are packed with antioxidants!
Storage Know-How
- Prepare your stuffing a day in advance and store it in the refrigerator covered tightly with plastic wrap. Just remember to let it cool completely before refrigerating to avoid moisture buildup.
Reheating Tips
- When ready to bake, let your stuffing sit at room temperature for about 30 minutes before cooking to ensure even heating. If it seems dry, add a splash of low-sodium chicken broth before popping it in the oven.
By following these tips, you’ll have a delightful, stress-free stuffing that shines on your holiday table! Looking for related recipes? Check out allrecipes.com for more festive ideas!
Serving Suggestions for Make-Ahead Classic Stuffing
When it comes to enjoying your make-ahead classic stuffing, presentation and pairing are key. Here are some delightful serving suggestions that elevate this dish to a whole new level.
Pairing with Proteins
- Turkey: Stuffing is a traditional companion for roasted turkey. Consider using herb-infused turkey or even turkey bacon wrapped around veggies for added flavor.
- Chicken: Serve your stuffing alongside roasted chicken or even chicken ham. The juiciness of the meat complements the stuffing’s texture beautifully.
Accompaniments
- Gravy: Drizzle a rich, homemade gravy over your stuffing for an extra layer of taste. Whether you choose a classic turkey or a vegetarian gravy, it’s a delicious addition.
- Cranberry Sauce: A splash of homemade cranberry sauce or a zesty cranberry-orange relish adds a sweet-tart pop that contrasts wonderfully with savory stuffing.
Serving Suggestions
- Family Style: Serve in a large bowl at the center of the table for a warm, communal feel.
- Individual Portions: For a more refined approach, consider using ramekins for individual servings, making it easy for guests to enjoy.
By presenting your make-ahead classic stuffing with these creative ideas, you not only enhance the flavor but also create an inviting dining experience. Interested in tricks for perfecting your stuffing? Check out resources from Epicurious or Bon Appétit for expert insights.
Time Breakdown for Make-Ahead Classic Stuffing
Preparation Time
Getting started with your make-ahead classic stuffing is as easy as pie! Allow about 20-30 minutes for chopping vegetables, measuring spices, and mixing your ingredients. This is your chance to get creative—think about introducing some of your favorite herbs or even a bit of citrus zest for a twist!
Cooking Time
Next, cooking your stuffing will take around 30-40 minutes. Just enough time to infuse those flavors while ensuring each bite is deliciously moist. If you’re making this ahead, feel free to pop it in the oven while you finish up other holiday dishes.
Total Time
All in all, you’re looking at about 1-1.5 hours from start to finish. This means more time to catch up with family and friends! For more tips on holiday meal planning, check out reliable resources like The Kitchn or Food Network. Embrace the joy of effortless entertaining with a little prep work now, and enjoy the stress-free holiday later!
Nutritional Facts of Make-Ahead Classic Stuffing
When you’re preparing your make-ahead classic stuffing for those festive gatherings, it’s always smart to know what you’re serving. Here’s a quick rundown on the nutrition profile to help you balance enjoyment and wellness.
Calories
A generous serving of this stuffing typically contains around 200-250 calories. It’s a comforting side that can fit into a balanced meal without overshooting your daily intake.
Protein
In terms of protein, you’ll gather about 5-7 grams per portion, depending on any added ingredients like turkey bacon or chicken ham. This makes it a hearty complement to your holiday spread, ensuring you stay fueled throughout the festivities.
Sodium
For those watching their sodium, this dish generally holds between 300-500 mg. Opting for low-sodium broth and seasonings can help keep this in check while still maintaining that savory flavor. For more tips on managing sodium in your diet, check out the American Heart Association.
Now that you have a clearer picture of the nutrition behind your make-ahead classic stuffing, you can confidently serve it to family and friends, knowing it strikes a nice balance between indulgence and health.
FAQs about Make-Ahead Classic Stuffing
When it comes to preparing an incredible holiday spread, make-ahead classic stuffing can truly be your best friend. Here, we address some commonly asked questions to help you master this delightful dish.
Can I freeze make-ahead stuffing?
Absolutely! Freezing is a fantastic option if you want to save your make-ahead classic stuffing for later. Just be sure to let it cool completely before transferring it to an airtight container or heavy-duty freezer bag. It can last up to three months in the freezer. When you’re ready to use it, simply thaw it in the fridge overnight and reheat it in the oven at 350°F until warmed through.
How do I keep stuffing from being too dry?
Dry stuffing is one of the common pitfalls, but it’s easily avoidable! Consider the following tips:
- Broth Balance: Use a combination of chicken broth and vegetable broth to enhance flavor without making it too wet.
- Moist Ingredients: Incorporating Turkey Bacon or sautéed vegetables like onions and celery can contribute to moisture.
- Eggs: A couple of eggs can also act as binders, helping to keep everything together while maintaining a lovely texture.
What can I add to make my stuffing unique?
This is where you can really let your creativity shine! Consider mixing in:
- Dried fruits: Such as cranberries or apricots for a sweet twist.
- Nuts: Walnuts or pecans give an excellent crunch and nutty flavor.
- Herbs: Fresh herbs like sage or thyme can elevate the flavor profile immensely.
Remember, the beauty of make-ahead classic stuffing lies in its versatility. Feel free to experiment and make it your own! For more tips, check out The Spruce Eats or Food Network for further inspiration. Happy stuffing!
Conclusion on Make-Ahead Classic Stuffing
Make-ahead classic stuffing is your trusty companion during the hectic holiday season. Imagine the relief of having one less dish to worry about on the big day! Preparing your stuffing in advance not only saves time but also allows the flavors to meld beautifully. You can customize it with ingredients like Turkey Bacon or Chicken Ham, making it a unique delight that fits your palate.
Remember, stuffing can stay in the refrigerator for up to three days before baking, keeping your prep stress-free. Elevate your holiday spread by serving this scrumptious dish with confidence. For more tips on holiday meals, check out Food Network for additional inspiration!
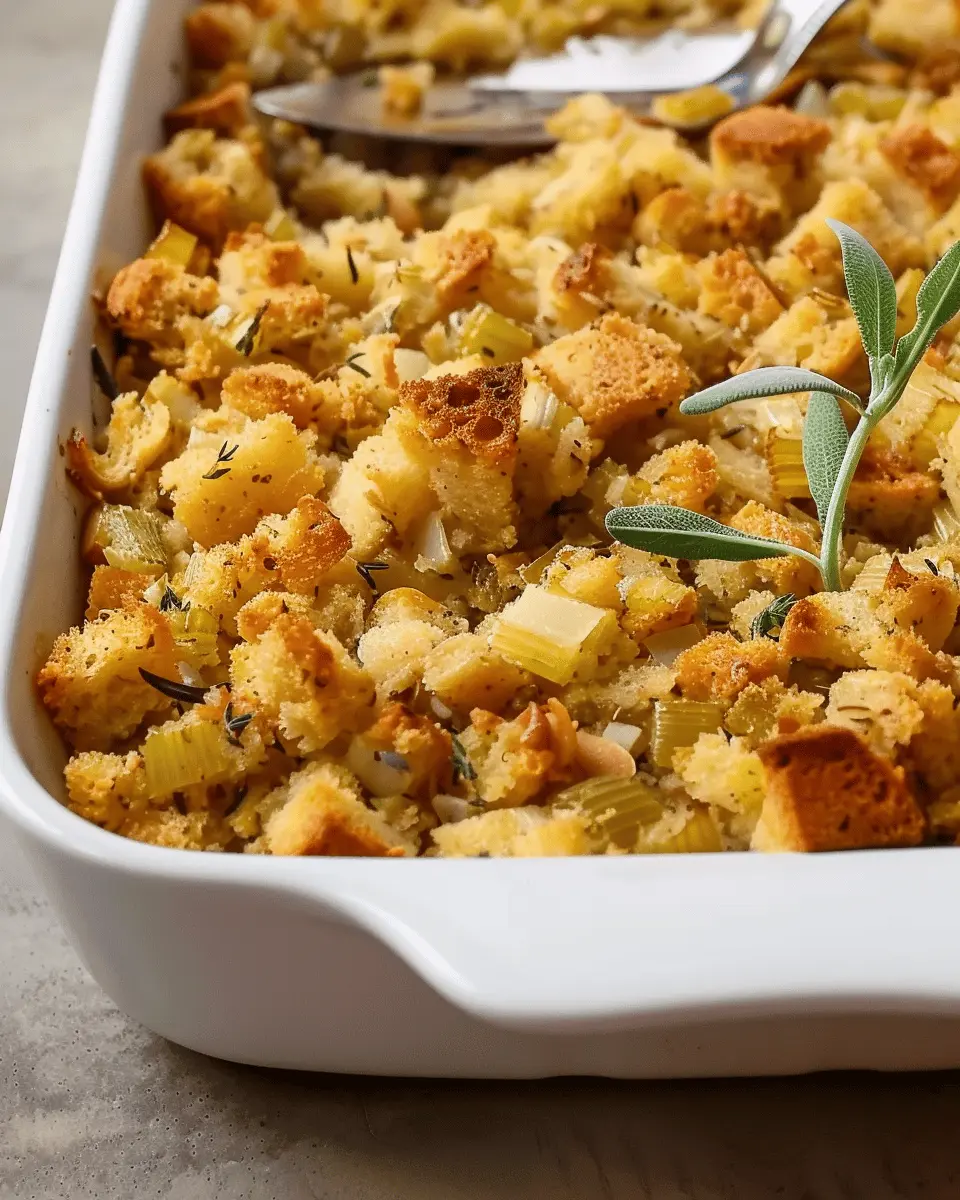
PrintMake-Ahead Classic Stuffing: The Best Holiday Time-Saver Recipe
Make-Ahead Classic Stuffing is the ultimate holiday time-saver, allowing you to prepare the perfect stuffing ahead of time without sacrificing flavor.
- Prep Time: 20 minutes
- Cook Time: 45 minutes
- Total Time: 1 hour 5 minutes
- Yield: 10 servings 1x
- Category: Side Dish
- Method: Baking
- Cuisine: American
- Diet: Vegetarian
Ingredients
- 1 loaf bread, cubed
- 1/2 cup butter
- 1 cup onion, chopped
- 1 cup celery, chopped
- 2 cups chicken broth
- 1 tablespoon sage
- 1 teaspoon thyme
- 1/2 teaspoon pepper
- 1/4 cup parsley, chopped
Instructions
- Preheat the oven to 350°F (175°C).
- In a large skillet, melt the butter over medium heat and sauté the onions and celery until soft.
- In a large bowl, combine the cubed bread, sautéed vegetables, broth, and seasonings. Mix until well combined.
- Transfer the mixture to a greased baking dish and cover with foil.
- Bake for 30 minutes, then remove the foil and bake for an additional 15-20 minutes until golden brown.
Notes
- For added flavor, consider adding cooked sausage or apples.
- This stuffing can be prepared one day in advance and stored in the refrigerator.
Nutrition
- Serving Size: 1 cup
- Calories: 320
- Sugar: 2g
- Sodium: 400mg
- Fat: 18g
- Saturated Fat: 10g
- Unsaturated Fat: 6g
- Trans Fat: 1g
- Carbohydrates: 36g
- Fiber: 2g
- Protein: 7g
- Cholesterol: 30mg
Keywords: Make-Ahead Classic Stuffing, Holiday Stuffing, Thanksgiving Recipe