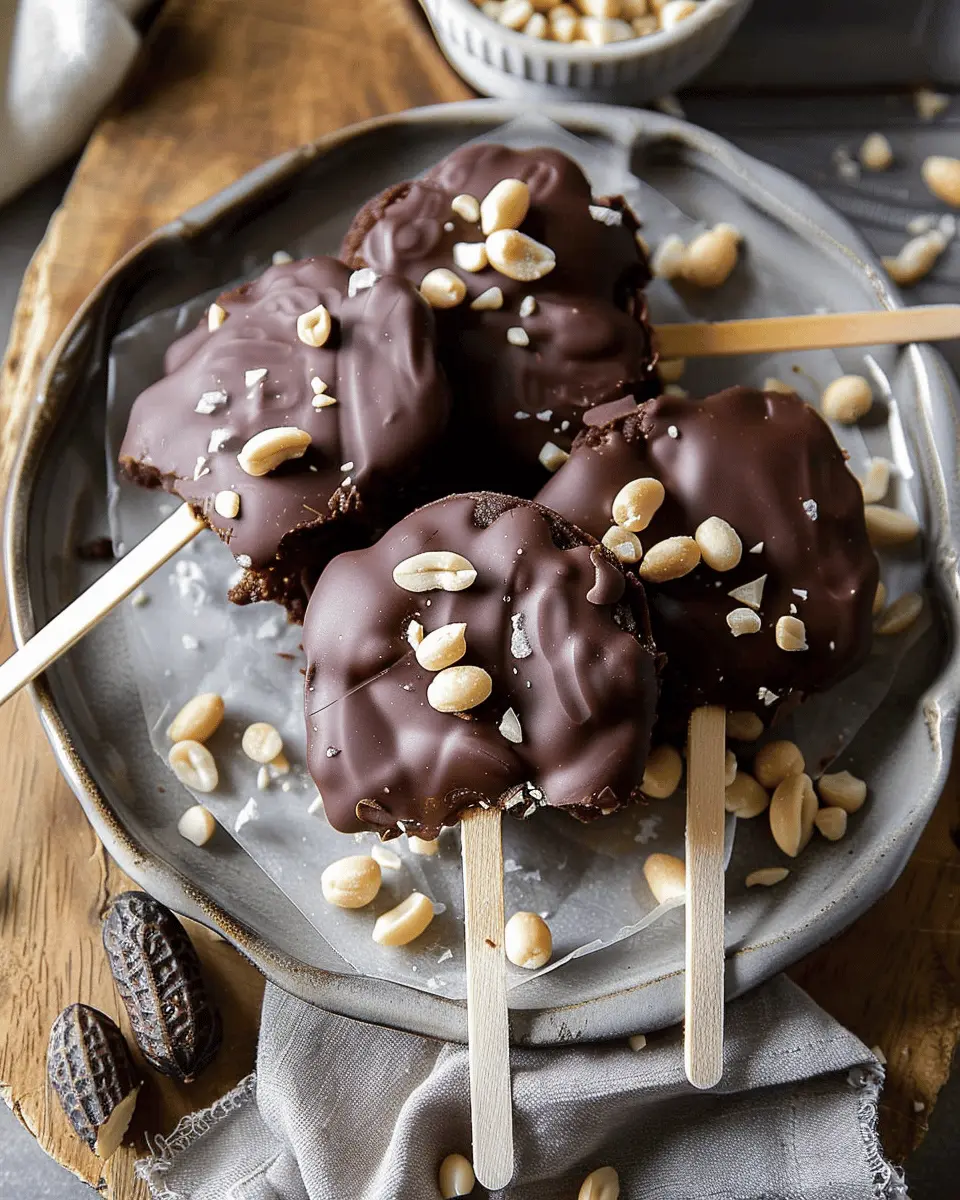
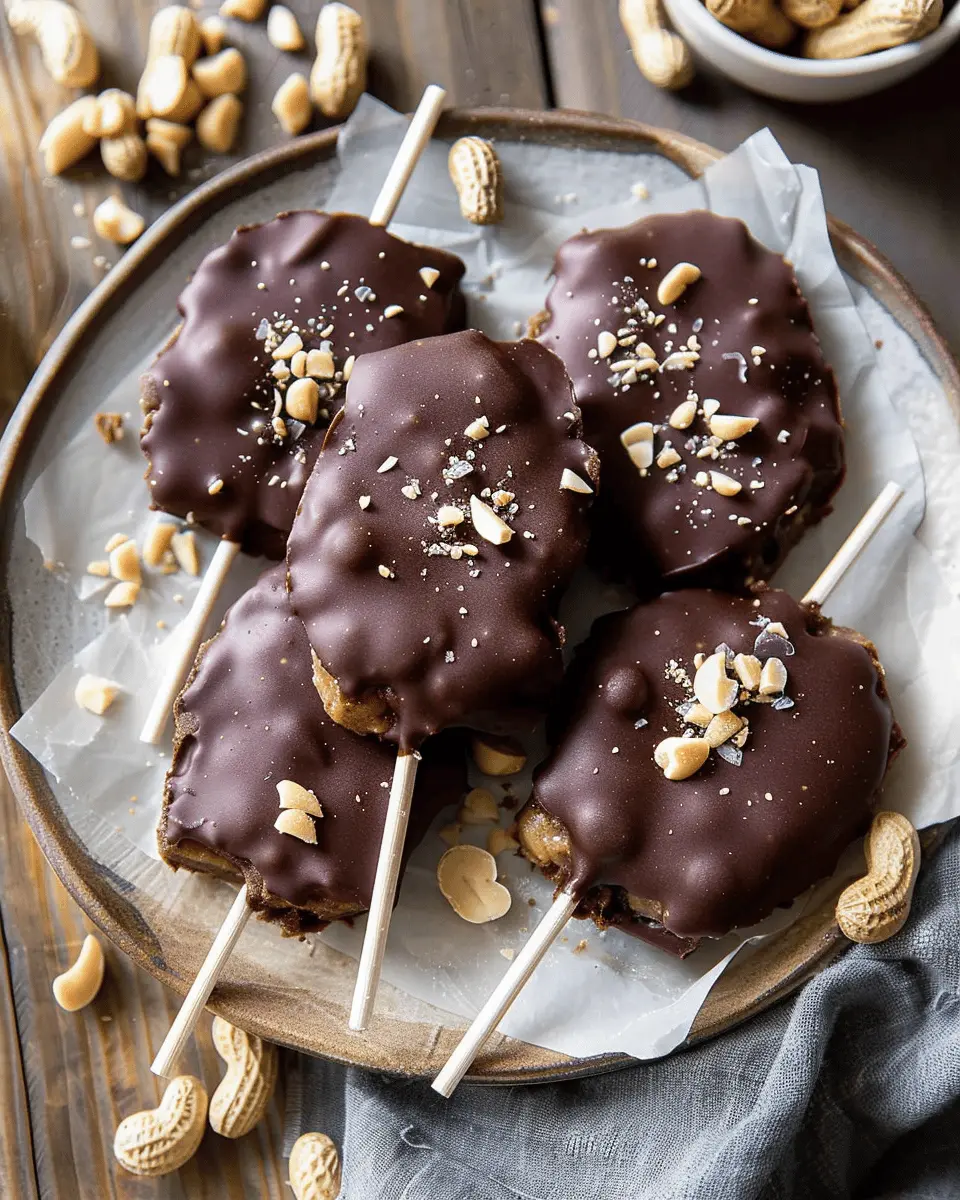
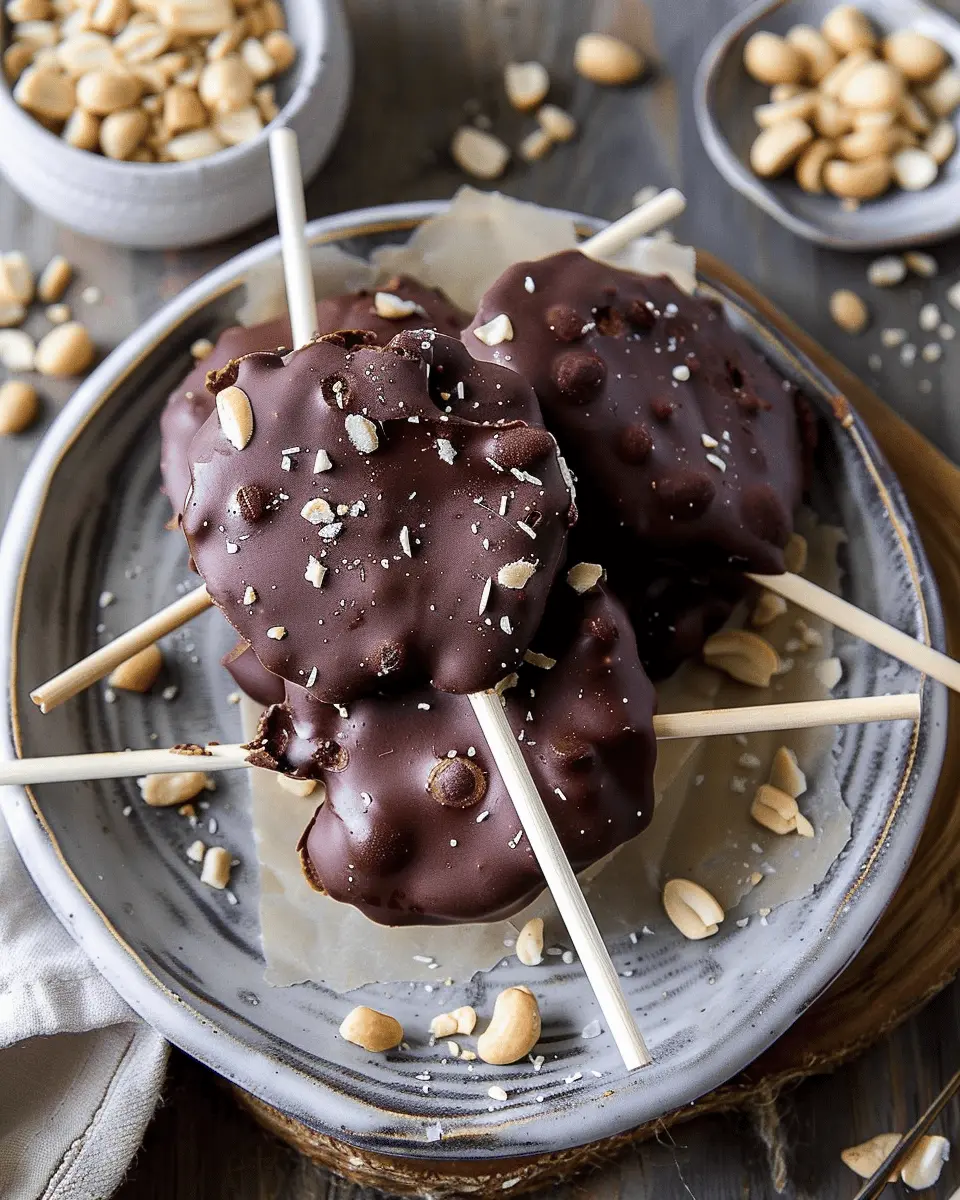
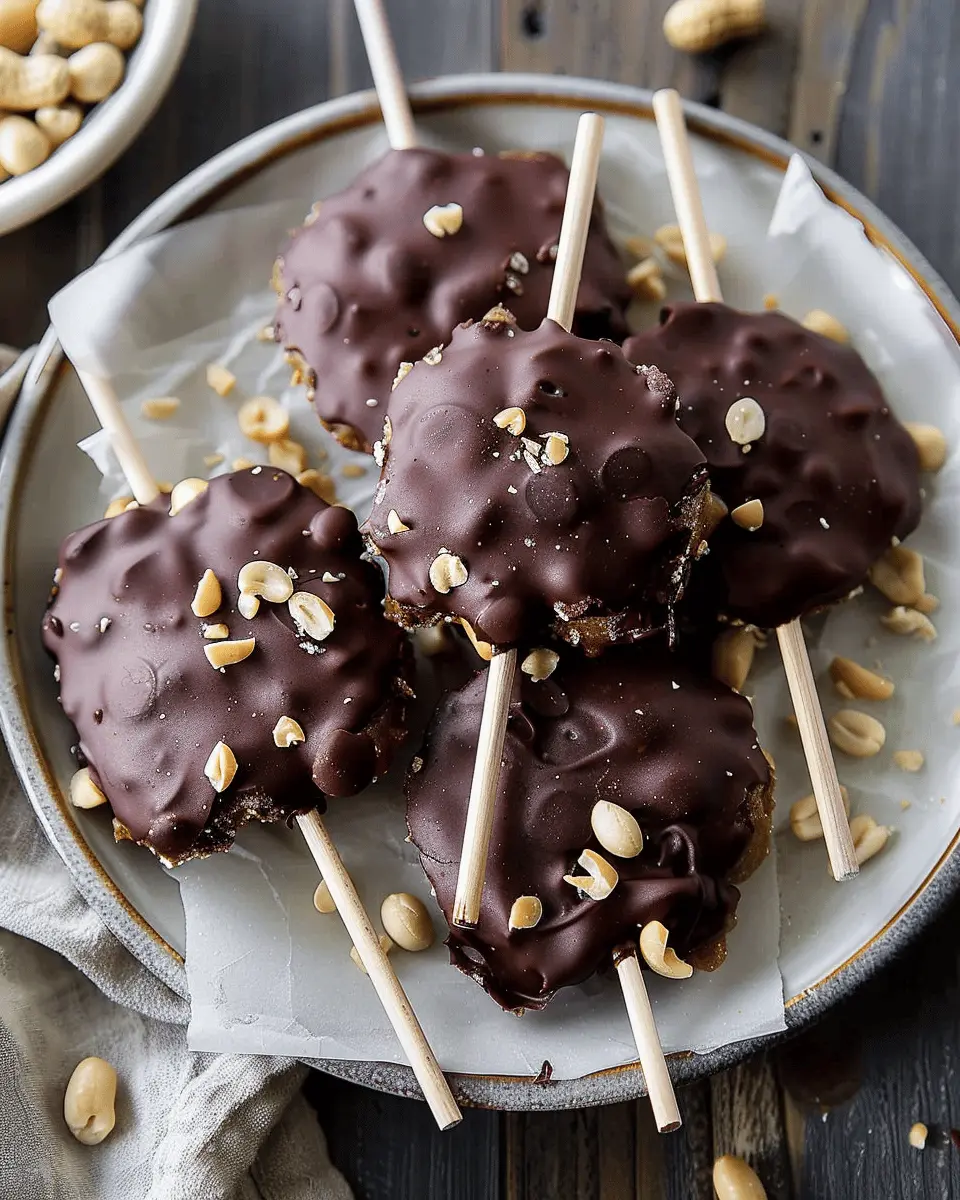
Introduction to Peanut Buster Bars
When it comes to indulgent desserts, few treats can rival the joy of Peanut Buster Bars. This delightful combination of creamy peanut butter, chocolate, and ice cream creates a sensory experience that is hard to resist. Imagine biting into a cool, refreshing layer of ice cream topped with rich fudge and crunchy peanuts, all encased in a simple yet satisfying cookie crust. Not only are these bars a crowd-pleaser, but they’re also incredibly easy to make at home, making them the perfect choice for gatherings or a cozy night in.
Why You’ll Love Peanut Buster Bars
-
Rich Flavor Combination: The harmonious blend of flavors in Peanut Buster Bars—from the salty crunch of peanuts to the velvety smoothness of chocolate—is nothing short of heavenly. This dessert strikes a perfect balance between sweet and savory, making it incredibly satisfying.
-
Versatile and Customizable: One of the best things about these bars is their versatility. You can easily swap ingredients to suit your preferences. Want to use dark chocolate instead of milk chocolate? Go for it! Prefer to mix in some crushed pretzels for an added crunch? Why not! The possibilities are endless.
-
Perfect for Any Occasion: Whether you’re hosting a summer barbecue, a birthday party, or just treating yourself on a lazy afternoon, Peanut Buster Bars are the ideal dessert. They’re easy to prepare in advance and can be stored in the freezer for a quick sweet fix.
-
Quick and Simple Recipe: Don’t let the delightful layers fool you; making these bars is a breeze! With just a handful of ingredients and minimal prep time, you’ll have a stunning dessert ready to impress. Plus, the kids can join in on the fun—who wouldn’t want to help with making a sweet treat?
For more tips on making incredible desserts like these, check out resources from The Kitchn and Serious Eats for inspiration.
So, if you’re ready to dive into a world of sweet flavors and delightful textures, grab your ingredients and let’s make some Peanut Buster Bars!
Ingredients for Peanut Buster Bars
Essential ingredients you’ll need
When crafting your delicious peanut buster bars, the foundation is key. Here’s what you’ll need to create that perfect blend of creaminess and crunch:
- Peanut Butter: Creamy or crunchy, your choice! Peanut butter gives these bars their rich flavor.
- Chocolate Chips: Semi-sweet or dark chocolate works wonderfully to balance the nuttiness.
- Oats: Rolled oats add a hearty texture, making these bars both satisfying and nutritious.
- Honey or Maple Syrup: This natural sweetener binds the ingredients while adding a lovely sweetness.
- Salt: A pinch of salt elevates the flavors, enhancing the overall taste.
Optional ingredients for customization
Feeling adventurous? You can customize your peanut buster bars to fit your personal taste:
- Nuts: Add almonds or walnuts for extra crunch and healthy fats.
- Dried Fruits: Raisins or cranberries can bring a chewy sweetness to the mix, maximizing textures.
- Protein Powder: Boost the nutritional profile for a post-workout snack or breakfast option.
Experiment with these to create your perfect version of peanut buster bars! Whether you prefer to indulge or enjoy a healthier twist, there’s a combination here for everyone. For more tips, check out this Peanut Nutrition Guide to learn about how nutritious these ingredients can be!
Preparing Peanut Buster Bars
When you’re craving a treat that combines sweet, salty, and downright delicious, nothing quite hits the spot like Peanut Buster Bars. This layered delight is not only perfect for sharing during get-togethers, but it’s also a fun project to tackle during your downtime. With a little patience and a few simple ingredients, you’ll have a homemade dessert that rivals your favorite ice cream shop. Let’s dive into the preparation, shall we?
Gather Your Ingredients
Before you get into the kitchen, it’s essential to gather all your necessary ingredients. Here’s what you’ll need:
-
For the Base:
-
1 cup of crushed graham crackers
-
¼ cup of melted butter
-
1/3 cup of sugar
-
For the Peanut Butter Filling:
-
1 cup of creamy peanut butter
-
1 cup of powdered sugar
-
1 cup of whipped cream (or you can use homemade whipped cream)
-
For the Topping:
-
1 cup of chocolate chips (semi-sweet works well)
-
1 tablespoon of vegetable oil (to thin the chocolate)
Having everything ready not only makes the process smoother but also adds to the excitement of creating these delightful peanut buster bars. Plus, it minimizes the risk of surprises midway through your recipe!
Prepare the Base
Now that you’ve got your ingredients, it’s time to make the base. In a medium-sized mixing bowl, combine the crushed graham crackers, melted butter, and sugar. This mixture should be crumbly but hold together when pressed.
- Tip: If you don’t have crushed graham crackers on hand, you can easily make your own by placing whole graham crackers in a ziplock bag and crushing them with a rolling pin.
Once mixed, press the buttery crumb mixture into the bottom of an 8×8-inch baking dish evenly. This will be the solid foundation for your delightful bars. Bake in a preheated oven at 350°F (175°C) for about 8-10 minutes, just until they’re slightly golden.
Make the Peanut Butter Filling
While the base is cooling, it’s time to whip up that creamy peanut butter filling. In a large mixing bowl, combine your creamy peanut butter and powdered sugar. Stir until well mixed—this may take a bit of elbow grease to achieve that perfect creamy consistency.
Next, gently fold in the whipped cream until it’s light and fluffy. This combination creates a dreamy filling that you’ll want to eat by the spoonful! (Trust me, I’ve been there.)
Assemble the Layers
With all your components ready, it’s time to assemble your bars. Spread the peanut butter filling over the cooled graham cracker base, smoothing it out evenly.
- Personal Tip: You can also add a layer of chopped peanuts for extra crunch at this stage; they add a nice texture to the bars!
After the filling is spread evenly, you can pop it in the fridge for a bit to help it set while you prepare the topping.
Top with Chocolate Drizzle
Finally, let’s talk about the crowning glory—the chocolate topping. In a microwave-safe bowl, combine the chocolate chips and vegetable oil. Heat in short bursts (10-15 seconds) until melted, stirring in between to achieve a smooth, glossy chocolate mixture.
Drizzle the melted chocolate over your assembled bars, ensuring to cover them well. Let the bars chill in the refrigerator for at least an hour to firm up completely.
Final Thoughts
Creating your own peanut buster bars doesn’t have to be a daunting task. With these manageable steps, you’ll transform simple ingredients into a decadent treat that’s sure to wow friends and family. So, why not give this recipe a try during your next chill day? Enjoy every delicious layer!
If you’re interested in other delightful dessert ideas, check out this dessert guide for more inspiration!
Variations on Peanut Buster Bars
Peanut Buster Bars are a delightful treat loved by many, but what if you have dietary restrictions or preferences? Don’t fret! There are plenty of variations that you can enjoy without missing out on that delicious flavor.
Nut-free Peanut Buster Bars
For those who need to skip the nuts, making nut-free Peanut Buster Bars is easy and satisfying. Simply replace peanut butter with sunflower seed butter or soy nut butter. Both options provide a similar creamy texture while being completely nut-free.
- Ingredients:
- Sunflower seed butter or soy nut butter
- Graham cracker crumbs
- Marshmallow fluff
- Chocolate chips (ensure they’re nut-free)
This variation not only maintains the creamy texture but also ensures everyone can enjoy a sweet indulgence. Don’t forget to check ingredient labels to avoid cross-contamination!
Vegan Peanut Buster Bars
If you’re following a vegan lifestyle, you can indulge in vegan Peanut Buster Bars without sacrificing flavor. Start by using dairy-free chocolate and plant-based margarine or coconut oil for that buttery goodness.
- Ingredients:
- Almond or coconut milk (for the base)
- Natural almond or cashew butter
- Graham crackers (check for vegan options)
- Dairy-free chocolate chips
This twist is not only suitable for vegans but also deliciously rich and satisfying. It’s a fantastic option for anyone looking to enjoy a classic dessert while being mindful of their diet.
By exploring these variations, you’ll never run out of ways to enjoy your favorite sweet treat. Plus, your friends and family will appreciate your thoughtful adaptations. For more ideas on how to substitute ingredients, check out sites like Minimalist Baker for inspiration!
No matter the variation, one thing is for sure: Peanut Buster Bars are a crowd-pleaser that can be tailored to suit anyone’s dietary needs.
Cooking tips for Peanut Buster Bars
Tips for a smoother consistency
To achieve a delightfully creamy texture in your peanut buster bars, make sure the peanut butter you use is at room temperature. Cold ingredients can cause clumping, so if you’re using natural peanut butter, give it a good stir before measuring. If you find your mix isn’t blending well, a dash of warm milk or non-dairy alternative can help. This will enhance the smoothness of your bars, making every bite melt in your mouth.
Storage tips for freshness
Once you’ve crafted these delicious peanut buster bars, storing them properly ensures they stay fresh longer. Wrap each bar individually in plastic wrap and place them in an airtight container. Refrigerating them is a great option to maintain firmness and extend their shelf life. You can also store them in the freezer for a quick treat later on—just remember to let them thaw a bit before enjoying! For more detailed storage guidelines, check out resources on food preservation. These small steps help keep your bars as tasty as the day you made them!
Serving Suggestions for Peanut Buster Bars
Creative Ways to Present Peanut Buster Bars
When it comes to showcasing your Peanut Buster Bars, presentation can make all the difference! Cut them into bite-sized squares and serve them on a vibrant platter sprinkled with crushed peanuts and a drizzle of chocolate syrup for an appealing touch. Consider adding a side of fresh strawberries or banana slices to create a colorful contrast that not only looks good but also adds a refreshing note alongside the rich bars.
For a more elegant touch, use parchment paper for lining your serving dish, which also makes clean-up a breeze. Those who love to host dinner parties will find these presentation tips handy for impressing guests!
Snack Pairing Suggestions
Looking to complement your Peanut Buster Bars? Pair them with some crunchy pretzels for added texture, or indulge in crunchy granola bars for a delightful snack combo. If you’re sipping something on the side, consider cold brew coffee or a creamy iced latte that perfectly balances the sweetness of the bars. You could even whip up a peanut butter smoothie for the ultimate peanut experience!
Feeling experimental? Try making a Peanut Buster Bars sundae by scooping vanilla or chocolate ice cream on top. The possibilities are endless! If you are interested in exploring more dessert pairing ideas, check out Serious Eats for tips to elevate your treats.
Time breakdown for Peanut Buster Bars
Planning your Peanut Buster Bars? It’s essential to be aware of the time each step will take. Here’s a handy breakdown to ensure you enjoy the process without feeling rushed.
Preparation time
Set aside about 20-30 minutes for preparation. You’ll need to melt some chocolate, mix in the creamy peanut butter, and assemble the delicious layers. It’s a straightforward process that’s more fun with a friend or two!
Chilling time
Once you’ve assembled your bars, let them chill in the refrigerator for approximately 2 hours. This crucial step helps the bars set and makes slicing them a breeze. Use this time to tidy up your space or plan your next treat.
Total time
In total, expect to invest around 2 hours and 30 minutes from start to finish. A little patience goes a long way! By the end, you’ll have perfect Peanut Buster Bars ready to impress your friends or enjoy as a sweet treat after a long day. Planning for dessert doesn’t have to be stressful; it can be fun! For more tips on delicious desserts, explore resources like Bon Appetit or Food Network.
Nutritional facts for Peanut Buster Bars
When you indulge in Peanut Buster Bars, knowing what you’re munching on can make it even more satisfying. Here’s a quick look at the nutritional profile of these delicious treats.
Calories per bar
Each Peanut Buster Bar typically contains around 250 calories. This makes them a tasty yet reasonable snack, especially when you’re craving something sweet and nutty without going overboard.
Breakdown of macronutrients
- Proteins: Approximately 6g
- Fats: About 14g
- Carbohydrates: Roughly 30g
These bars offer a balanced mix of macronutrients, making them a delightful treat that includes healthy fats and a moderate amount of carbohydrates and proteins. According to the American Heart Association, choosing snacks with healthy fats can contribute positively to your overall well-being.
So, next time you treat yourself to a Peanut Buster Bar, remember it can be part of a balanced diet. Enjoy savoring every bite, knowing you’ve made a delicious choice!
FAQs about Peanut Buster Bars
Can I use another nut butter?
Absolutely! While traditional peanut butter is a classic choice, you can swap it for other nut butters like almond butter or cashew butter. Just keep in mind that each nut butter has its unique flavor and texture that could slightly alter the final result. For a nut-free version, consider sunflower seed butter—it mimics the creamy texture of peanut butter and is school-friendly!
How long do these bars last?
When stored in an airtight container, your peanut buster bars will remain fresh for about a week at room temperature. If you want them to last longer, consider refrigerating them, which can extend their life up to two weeks. For even more longevity, you can freeze them for up to three months! Just make sure to wrap them well before popping them in the freezer. To enjoy, simply let them thaw in the fridge for a few hours.
What if I don’t have chocolate chips?
No chocolate chips? No problem! You can get creative with your toppings. Try using chopped dried fruit, shredded coconut, or even a drizzle of honey or maple syrup on top. For a more decadent twist, consider using chunks of your favorite candy bar or even a sprinkle of crushed nuts for added crunch. Check out this dairy-free chocolate resource for alternatives if you’re looking for something specific.
Feel free to ask any more questions in the comments. I love helping you make the best peanut buster bars possible!
Conclusion on Peanut Buster Bars
Wrap up and encourage homemade goodness
In conclusion, making Peanut Buster Bars at home is both rewarding and satisfying. Not only do you control the ingredients, ensuring a delicious blend of flavors, but you also have the opportunity to impress friends with your culinary skills. Imagine the joy of taking a bite into layers of creamy peanut butter and rich chocolate – it’s a simple delight that can easily become a signature treat!
With customizable variations, from adding your favorite nuts to experimenting with different chocolates, the possibilities are endless. So why not gather some friends, whip up a batch, and enjoy the sweet moments that homemade goodness brings?
For more inspiration, check out Serious Eats or explore BBC Good Food for delightful recipes. Be sure to savor your creations; after all, there’s nothing quite like a homemade dessert to brighten your day!
PrintPeanut Buster Bars: Indulgent Treats for Your Sweet Cravings
These Peanut Buster Bars are the perfect indulgent treats for satisfying your sweet cravings.
- Prep Time: 20 minutes
- Cook Time: 0 minutes
- Total Time: 2 hours
- Yield: 16 bars 1x
- Category: Desserts
- Method: No-bake
- Cuisine: American
- Diet: Vegetarian
Ingredients
- 1 cup creamy peanut butter
- 1 cup granulated sugar
- 1 cup brown sugar
- 2 cups graham cracker crumbs
- 2 cups chocolate chips
- 1 cup chopped peanuts
Instructions
- In a large bowl, mix together peanut butter, granulated sugar, and brown sugar until well combined.
- Stir in graham cracker crumbs until the mixture is thick and crumbly.
- Press the mixture into a lined baking dish.
- Melt chocolate chips and pour over the peanut mixture, spreading evenly.
- Sprinkle chopped peanuts on top of the chocolate layer.
- Refrigerate until firm, then cut into bars.
Notes
- For a richer flavor, use dark chocolate chips.
- Store leftovers in an airtight container.
Nutrition
- Serving Size: 1 bar
- Calories: 250
- Sugar: 20g
- Sodium: 150mg
- Fat: 14g
- Saturated Fat: 4g
- Unsaturated Fat: 8g
- Trans Fat: 0g
- Carbohydrates: 30g
- Fiber: 2g
- Protein: 5g
- Cholesterol: 0mg
Keywords: Peanut Buster Bars, dessert, sweet treats